
I’m back on the road, this time to Colorado–the state of my birth! It’s always exciting to go back, even though I didn’t live there long at all. The state is gorgeous and the folks are always kind. This time, I came to teach a two-day workshop at The Quilted Cow in Colorado Springs.
We started the night before with a trunk show with a dozen samples of the Elemental Coat and that got folks thinking creatively about what they wanted to use and what they might do with their coat to make it their own.
Becky
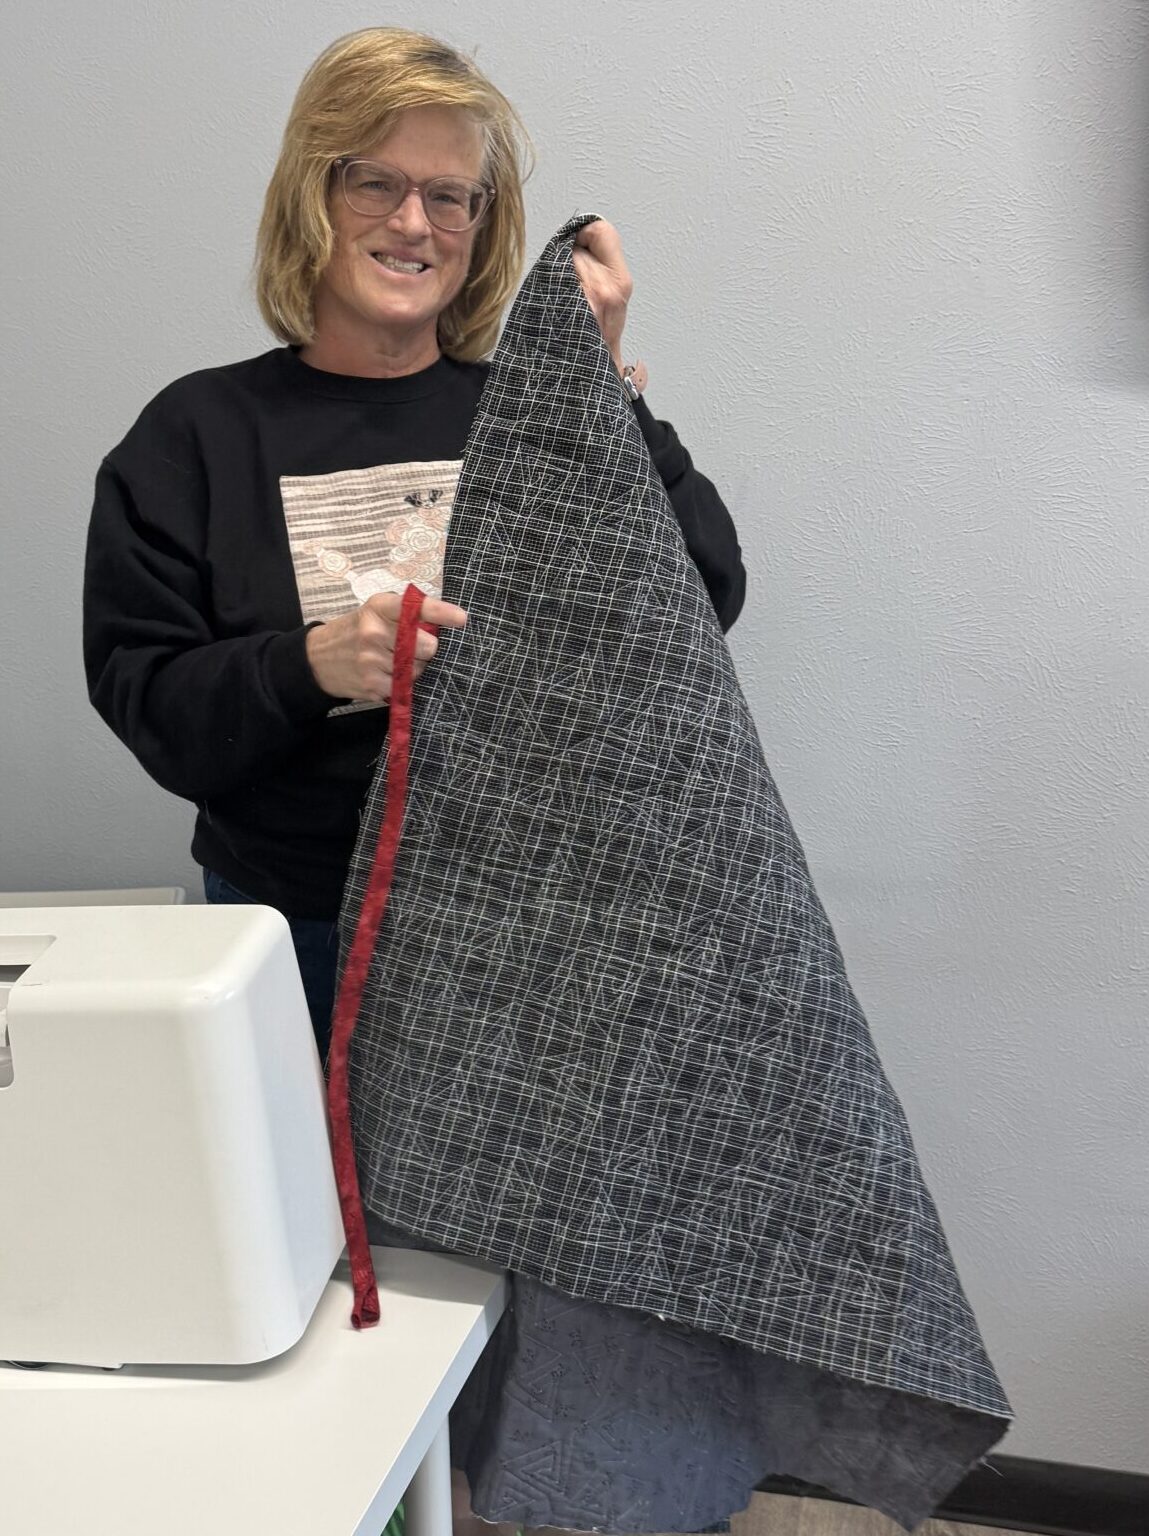
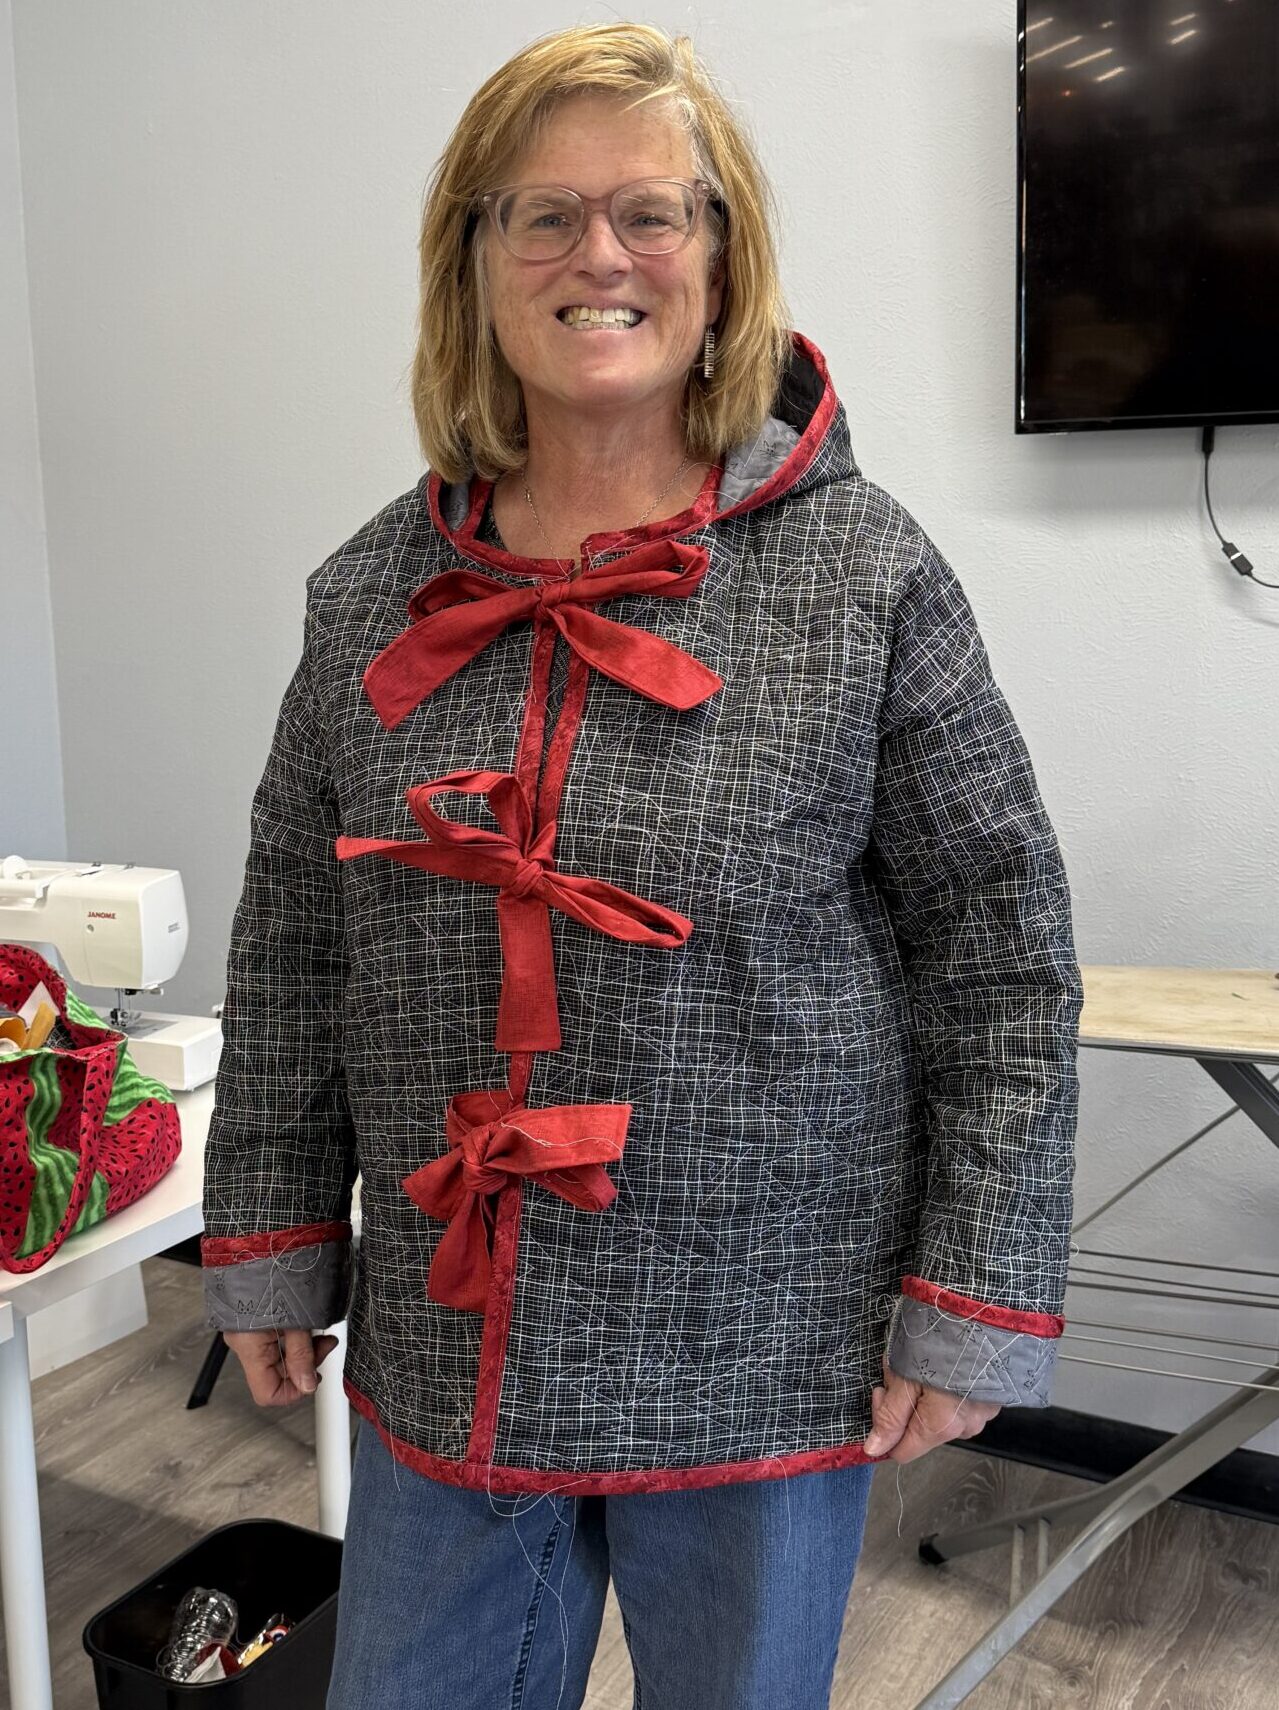
Becky quilted yardage for her jacket, using a sort of grey plaid for the outside and a fun, demure kitty print for the inside. Then she made it pop with the red binding. I love this “pop of color” on both quilts and quilt coats, but she took hers the extra mile by adding bows down the front using the same binding fabric. So cute!
Read more: Quilts to Coats [The Quilted Cow-Colorado]She added a few inches to the Hip length cutting line and used the Hood option. Becky also added a little length to her sleeves so she could turn it up and cuff it (showing off the kitty print!). This is one way to add a cuff, though it leaves exposed seams on your sleeve. She could bind them with a Hong Kong finish on each seam allowance. Or trim them and bind them like she did with the hood.
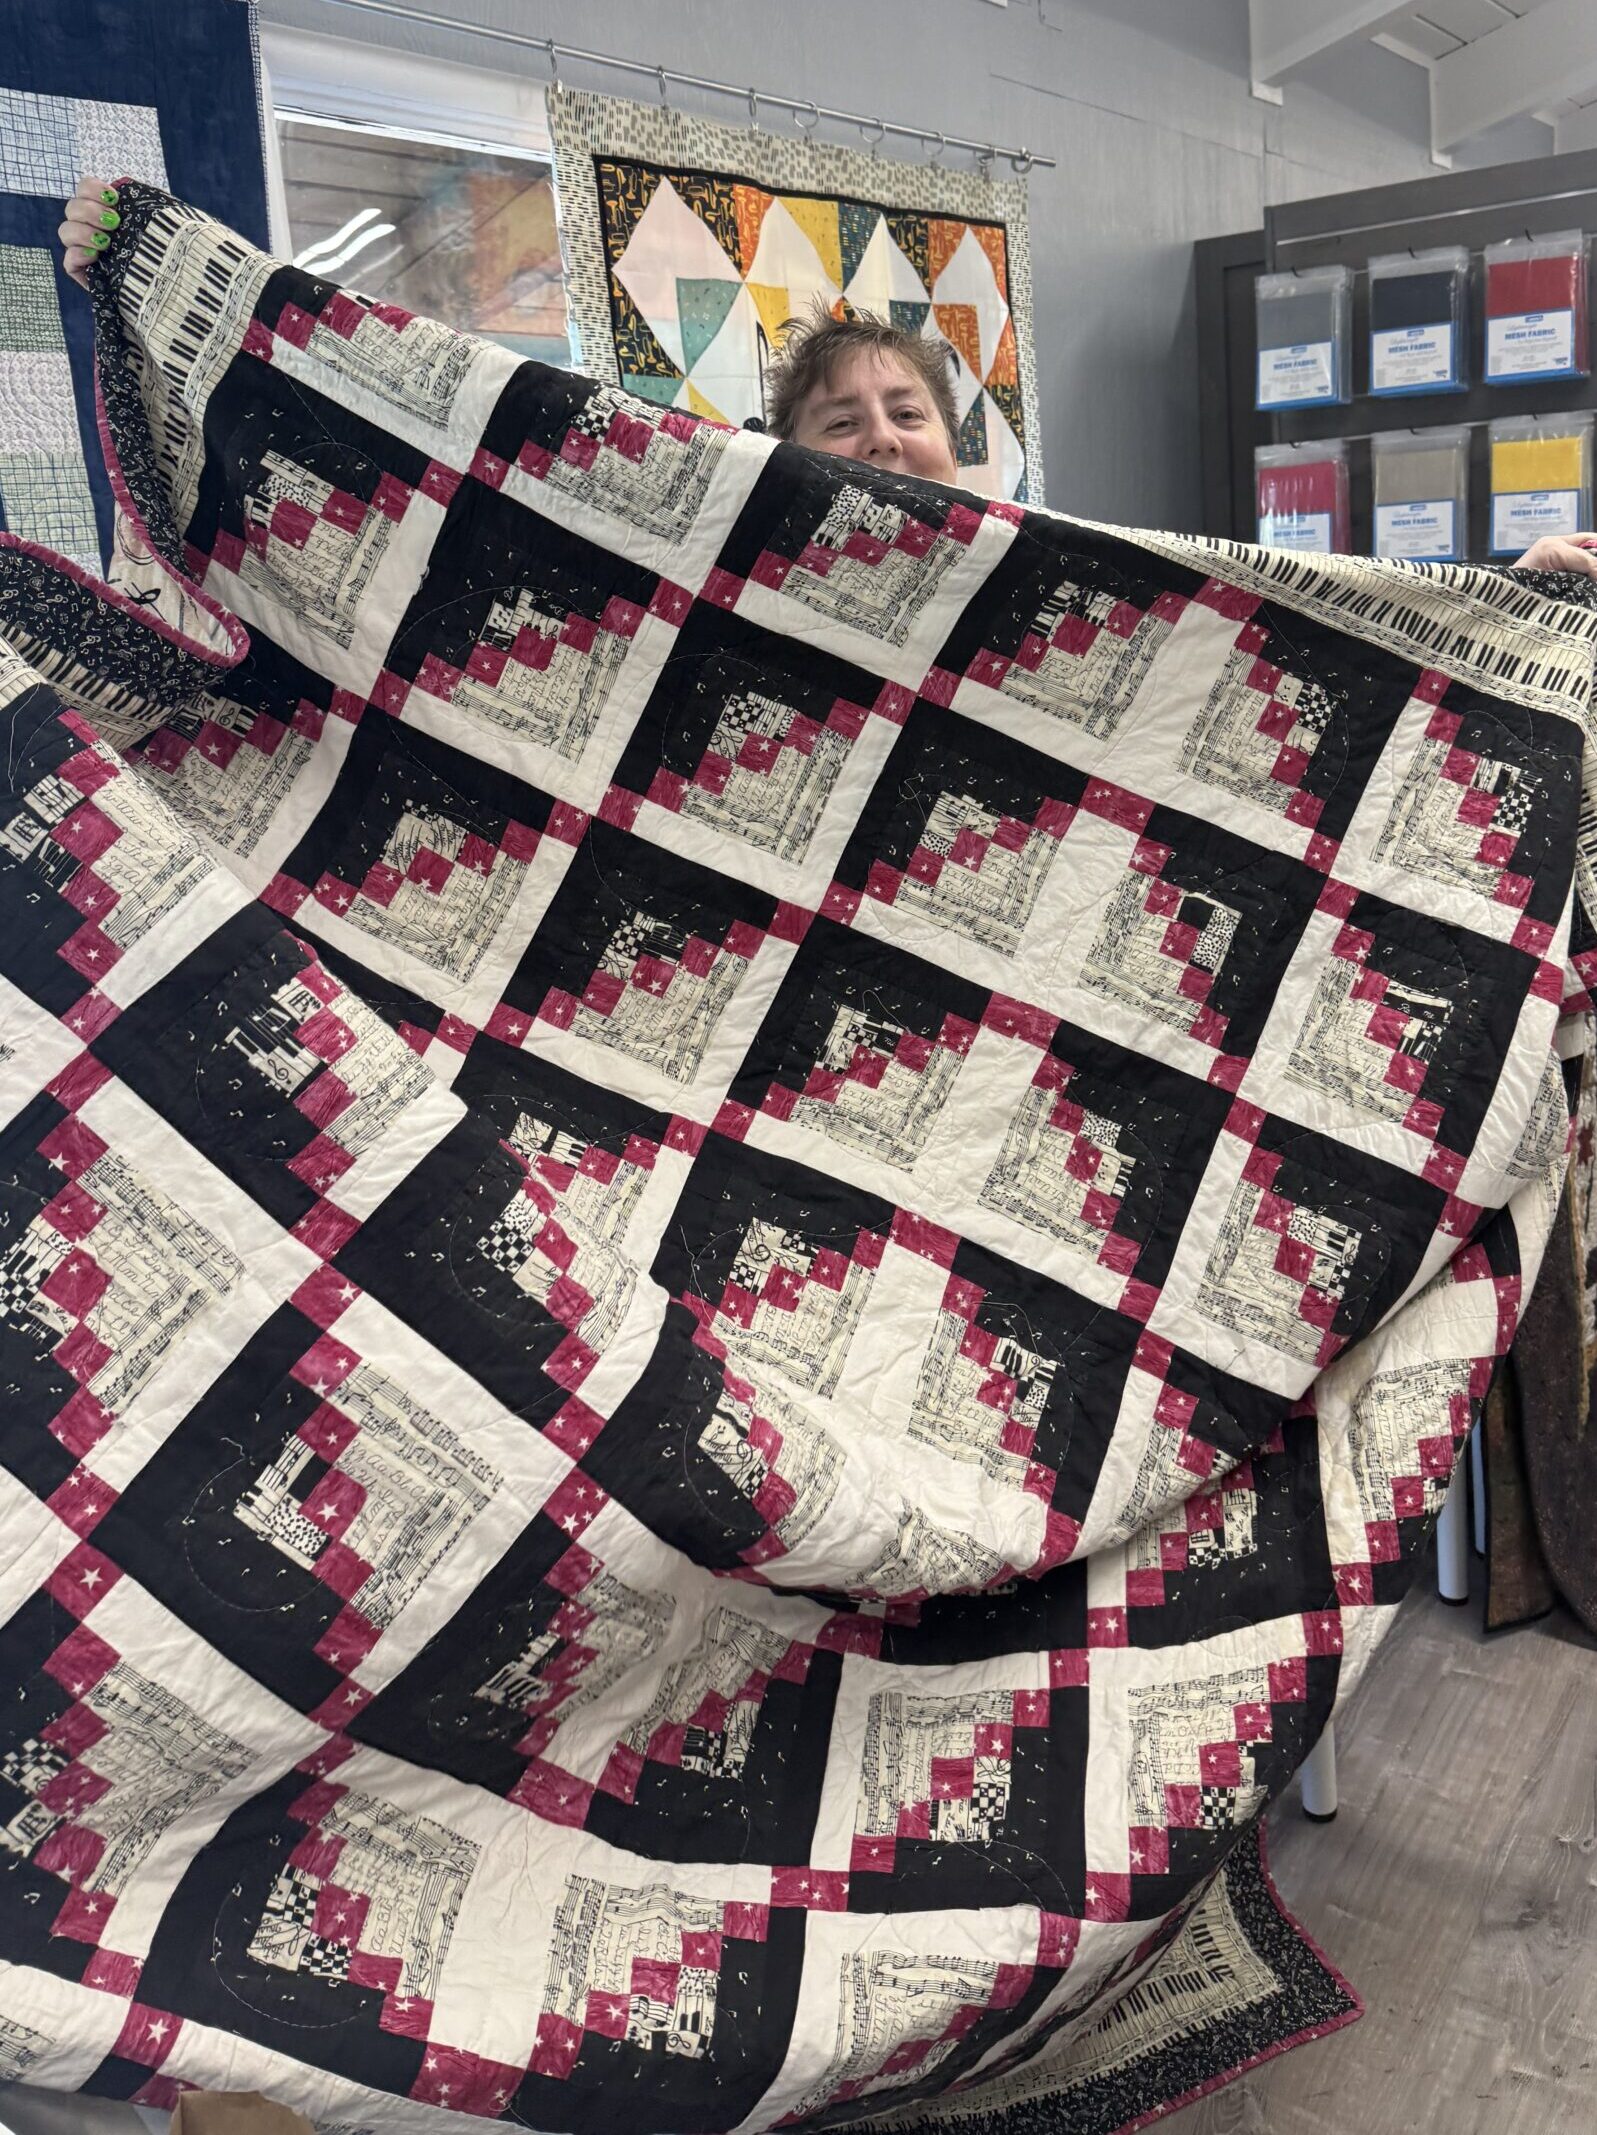
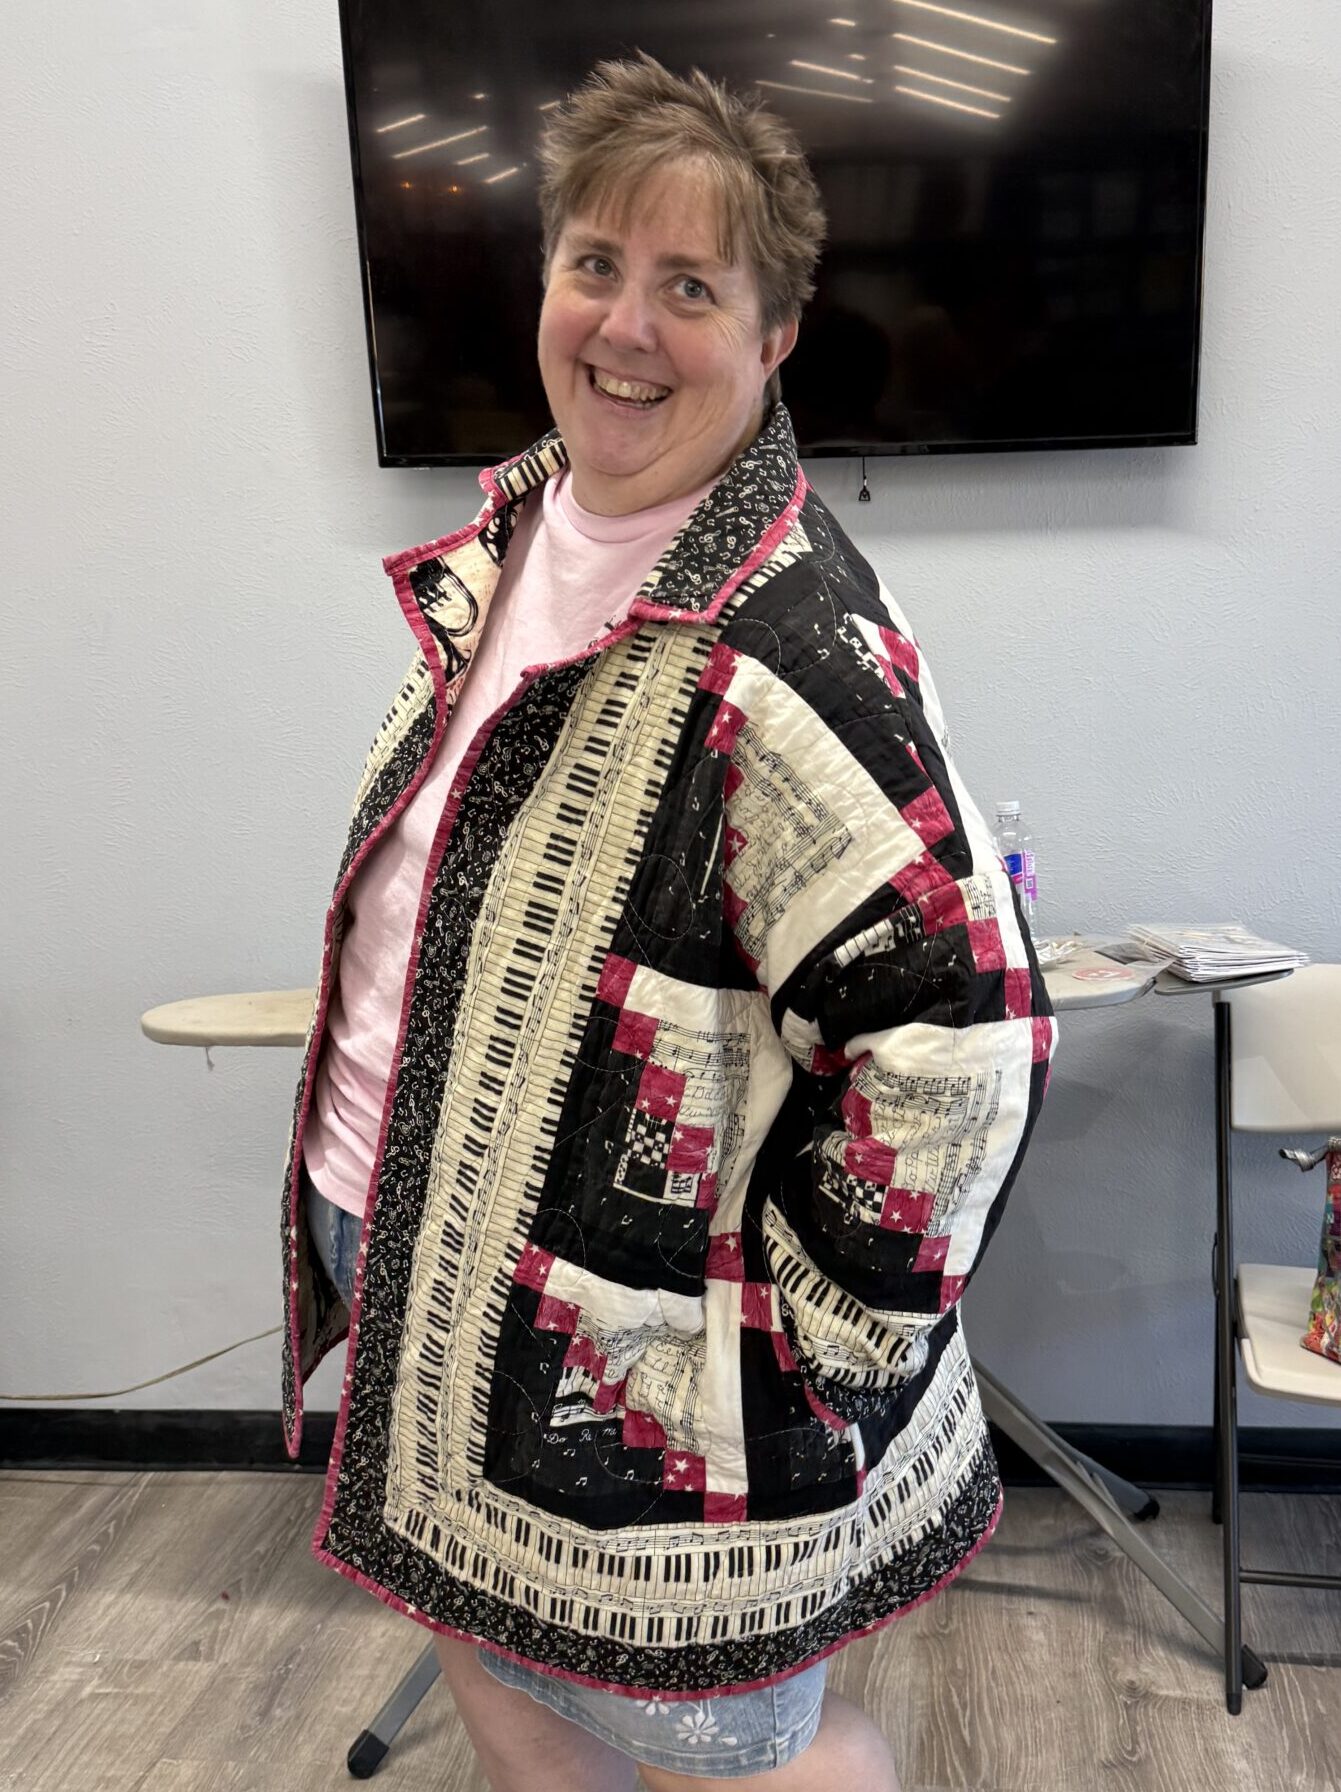
Nancy
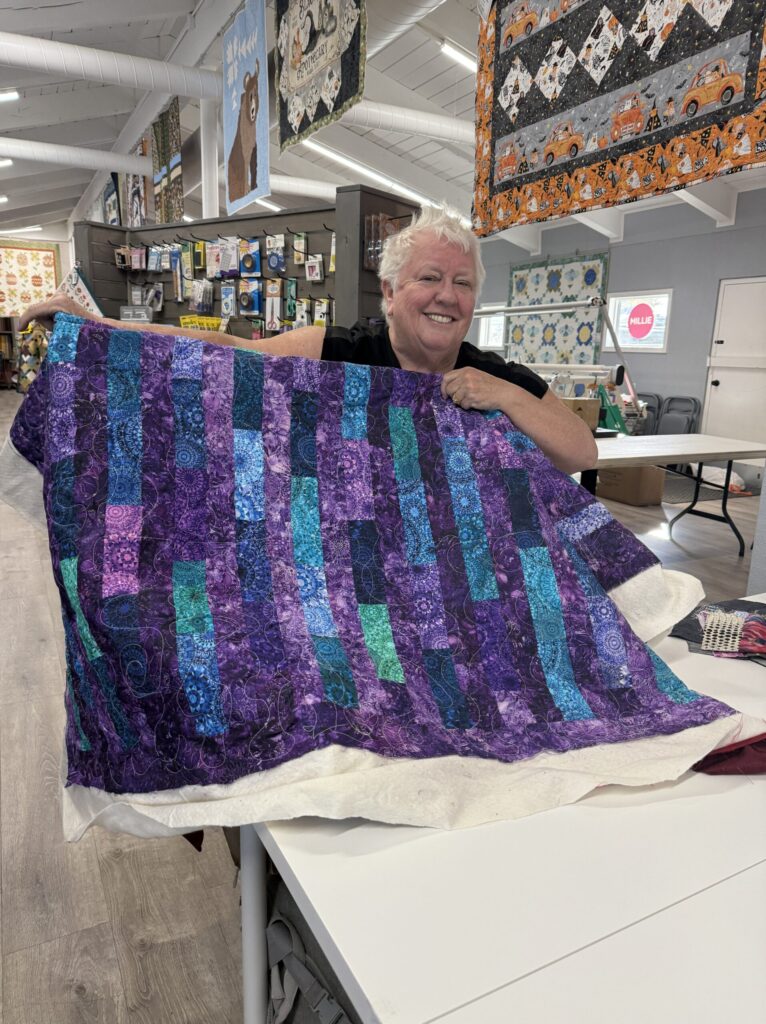
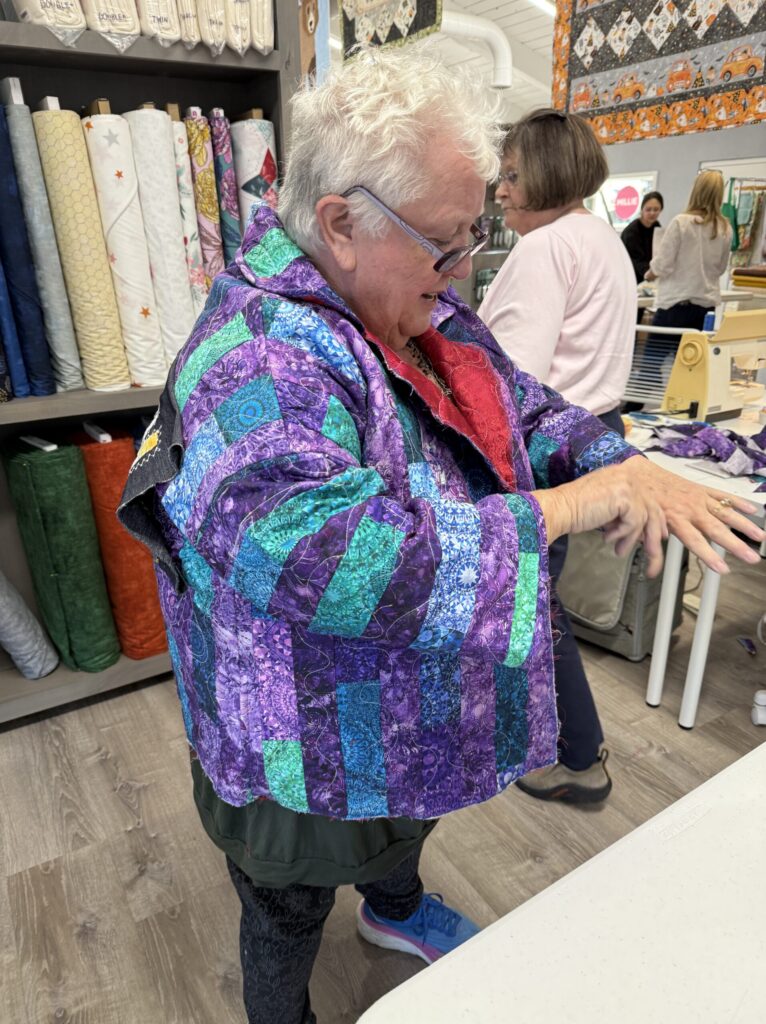
Nancy used a variety of 2 1/2″ strip scraps to create a twin-sized top and then backed it with red silk (see the lapel in the second photo), then practiced her long-armed skills on it.
Nancy used the Hip length and added a Collar for hers. We played with the layout of the pattern pieces a bit and decided on the strips running vertical on the body of the jacket and horizontal on the sleeve. I love how well it turned out! She’s adding an applique to the back, but it’s just pinned on for now.
Julia
This was the first quilt Julia ever made, but it had been well loved and seams were starting to come apart, so she decided to upcycle it into a quilt coat so she could still use it. I love when folks do this! It makes the coat really meaningful and gives the quilt a whole new life!
She used the Full length and added a Collar. We enlarged the Arms to make it more comfortable by splitting the pattern down the middle and adding an inch. After basting the sleeves, she decided to taper the cuffs down to the original size, which worked perfectly!
The other thing that Julia did is to use the existing binding on the coat, by putting coat fronts on the corners of the quilt. She used another side for the back, as well as the sleeves, so the only thing she had to bind was a little bit on the collar (using this technique) and then the neckline. For that, she simply pulled out her scraps and removed some binding, so it all matches perfectly.
Herma
I’ve wanted to try making the Elemental Coat with a panel, but I haven’t gotten to it yet, so I was thrilled to see that’s what Herma had done. She used coordinating prints in a simple quilt design on either side of it, then quilted it herself using a really cute cat pantograph.
Herma used the Full length and added a Collar. One thing I love about her coat is the atypical use of the fabrics. Her back is the vertical panel, but the fronts were cut on the diagonal so there’s a little movement to it. Then she decided to turn the sleeves inside out and show the backing on them. Because she had scrap-pieced her backing, the sleeves didn’t match (one has a white background, the other a black background), but that just added more fun to a very lively quilt coat.
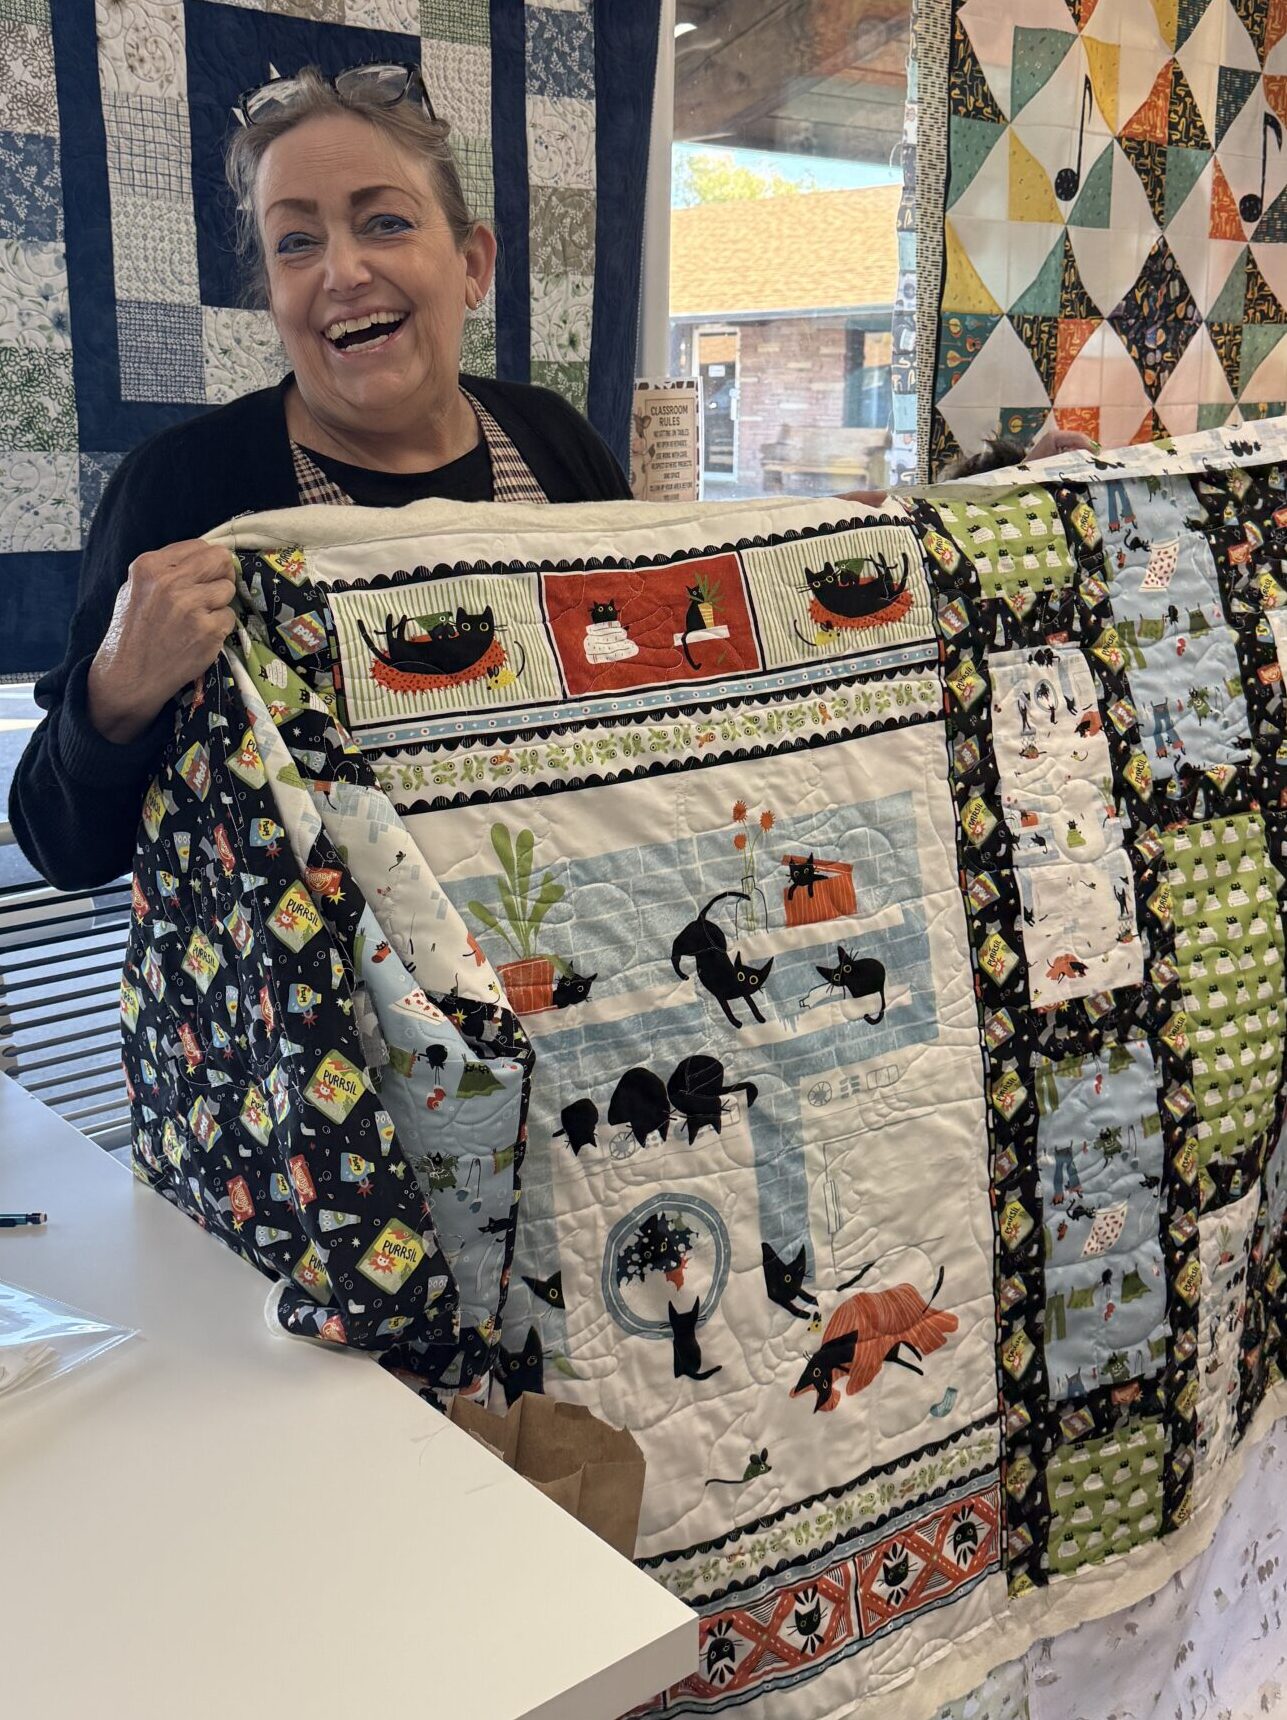
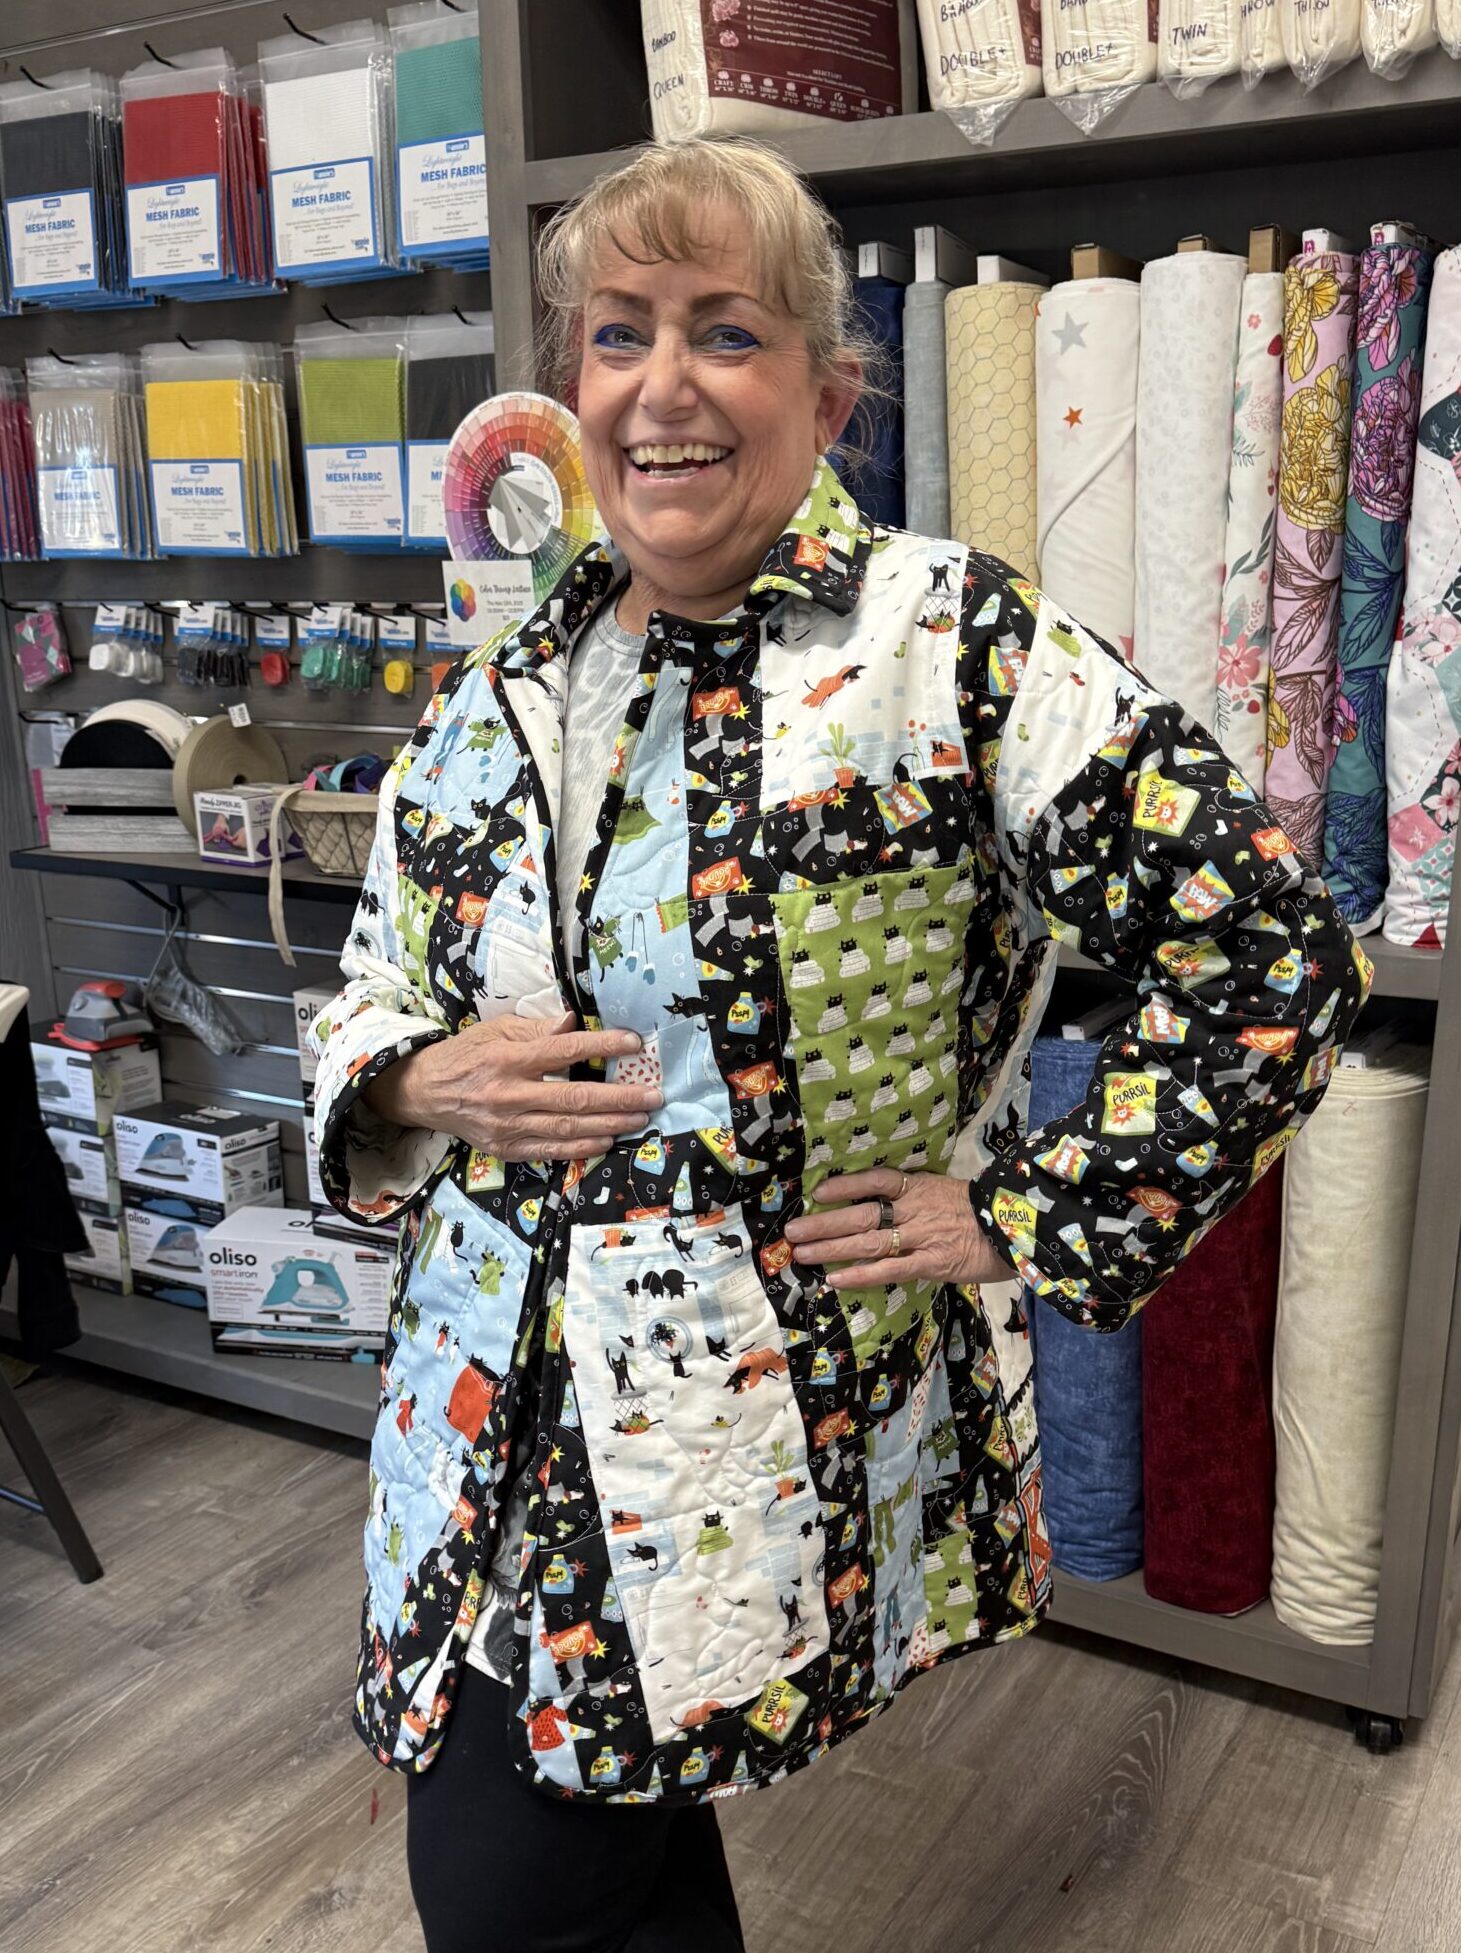
Becky
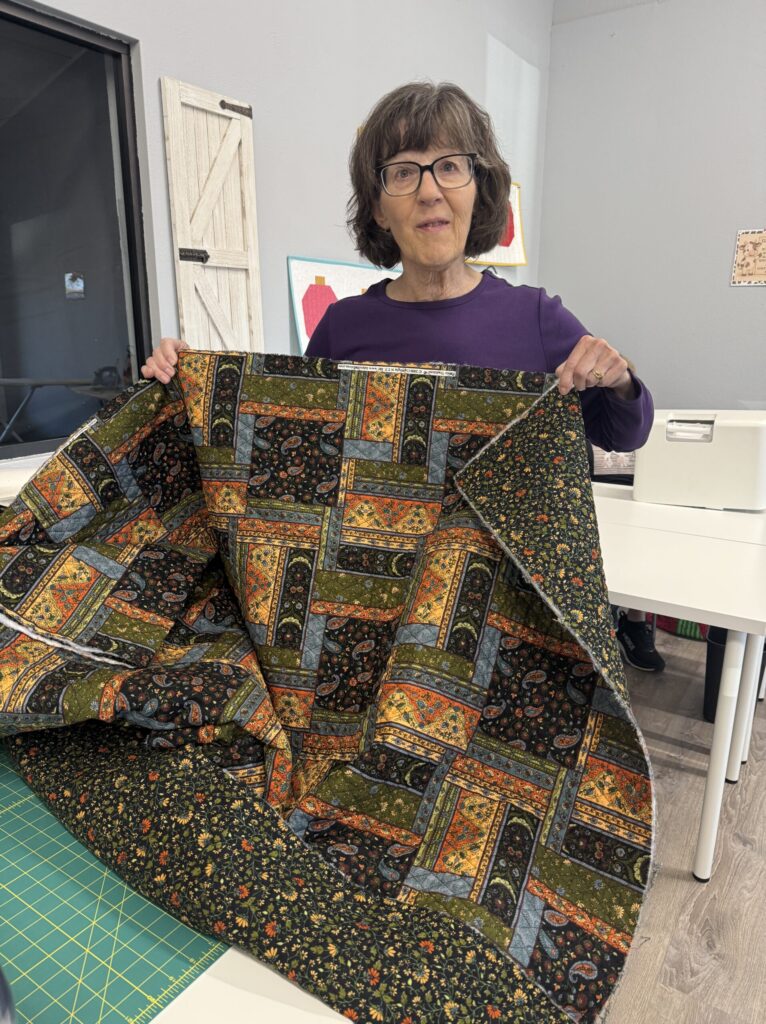
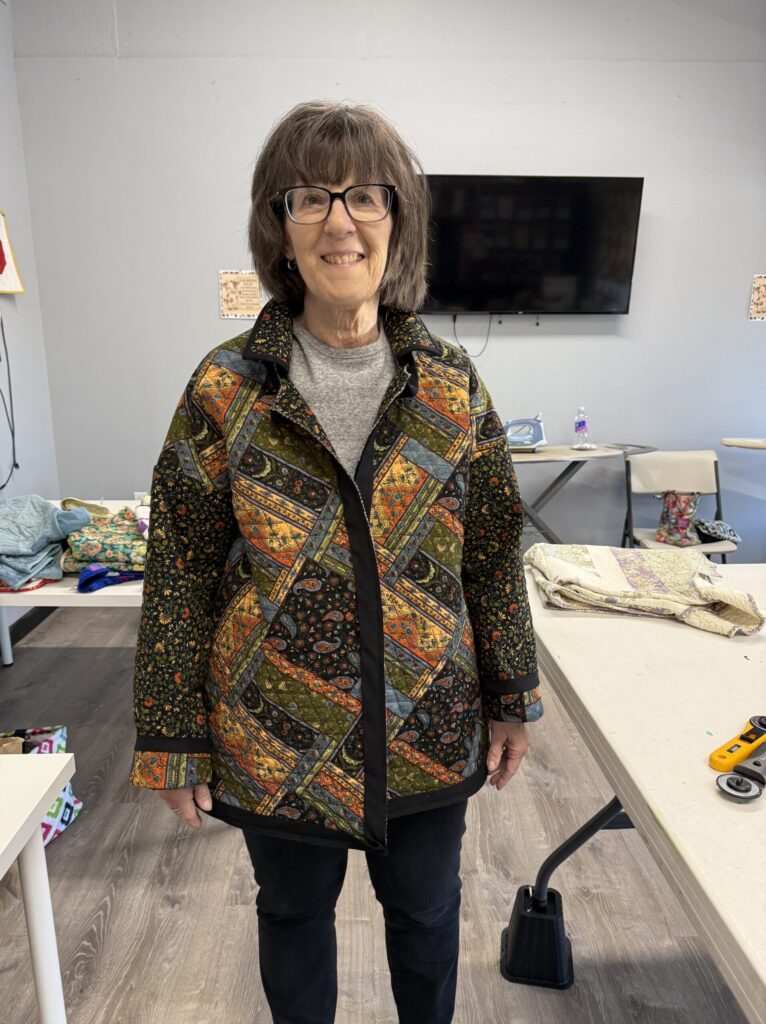
Becky picked up some pre-quilted fabric to save time and because she wasn’t quite sure what and how she’d use a quilt. After our trunk show, she went home to scavenge through quilts to find one for her next Elemental Coat.
She used the Full Length and added a Collar. She got creative with her fabric layout and it made for such a great finish! She placed the patterns on her fabric at a 45-degree angle for the fronts and back pieces. This gives it some energy that the fabric lacked before. Then she used the backing side of the fabric for the collar and the sleeves. Becky then added separate cuffs, using the outside fabric again for them. Such a fun mix and really adds some visual interest to her coat.
Patty
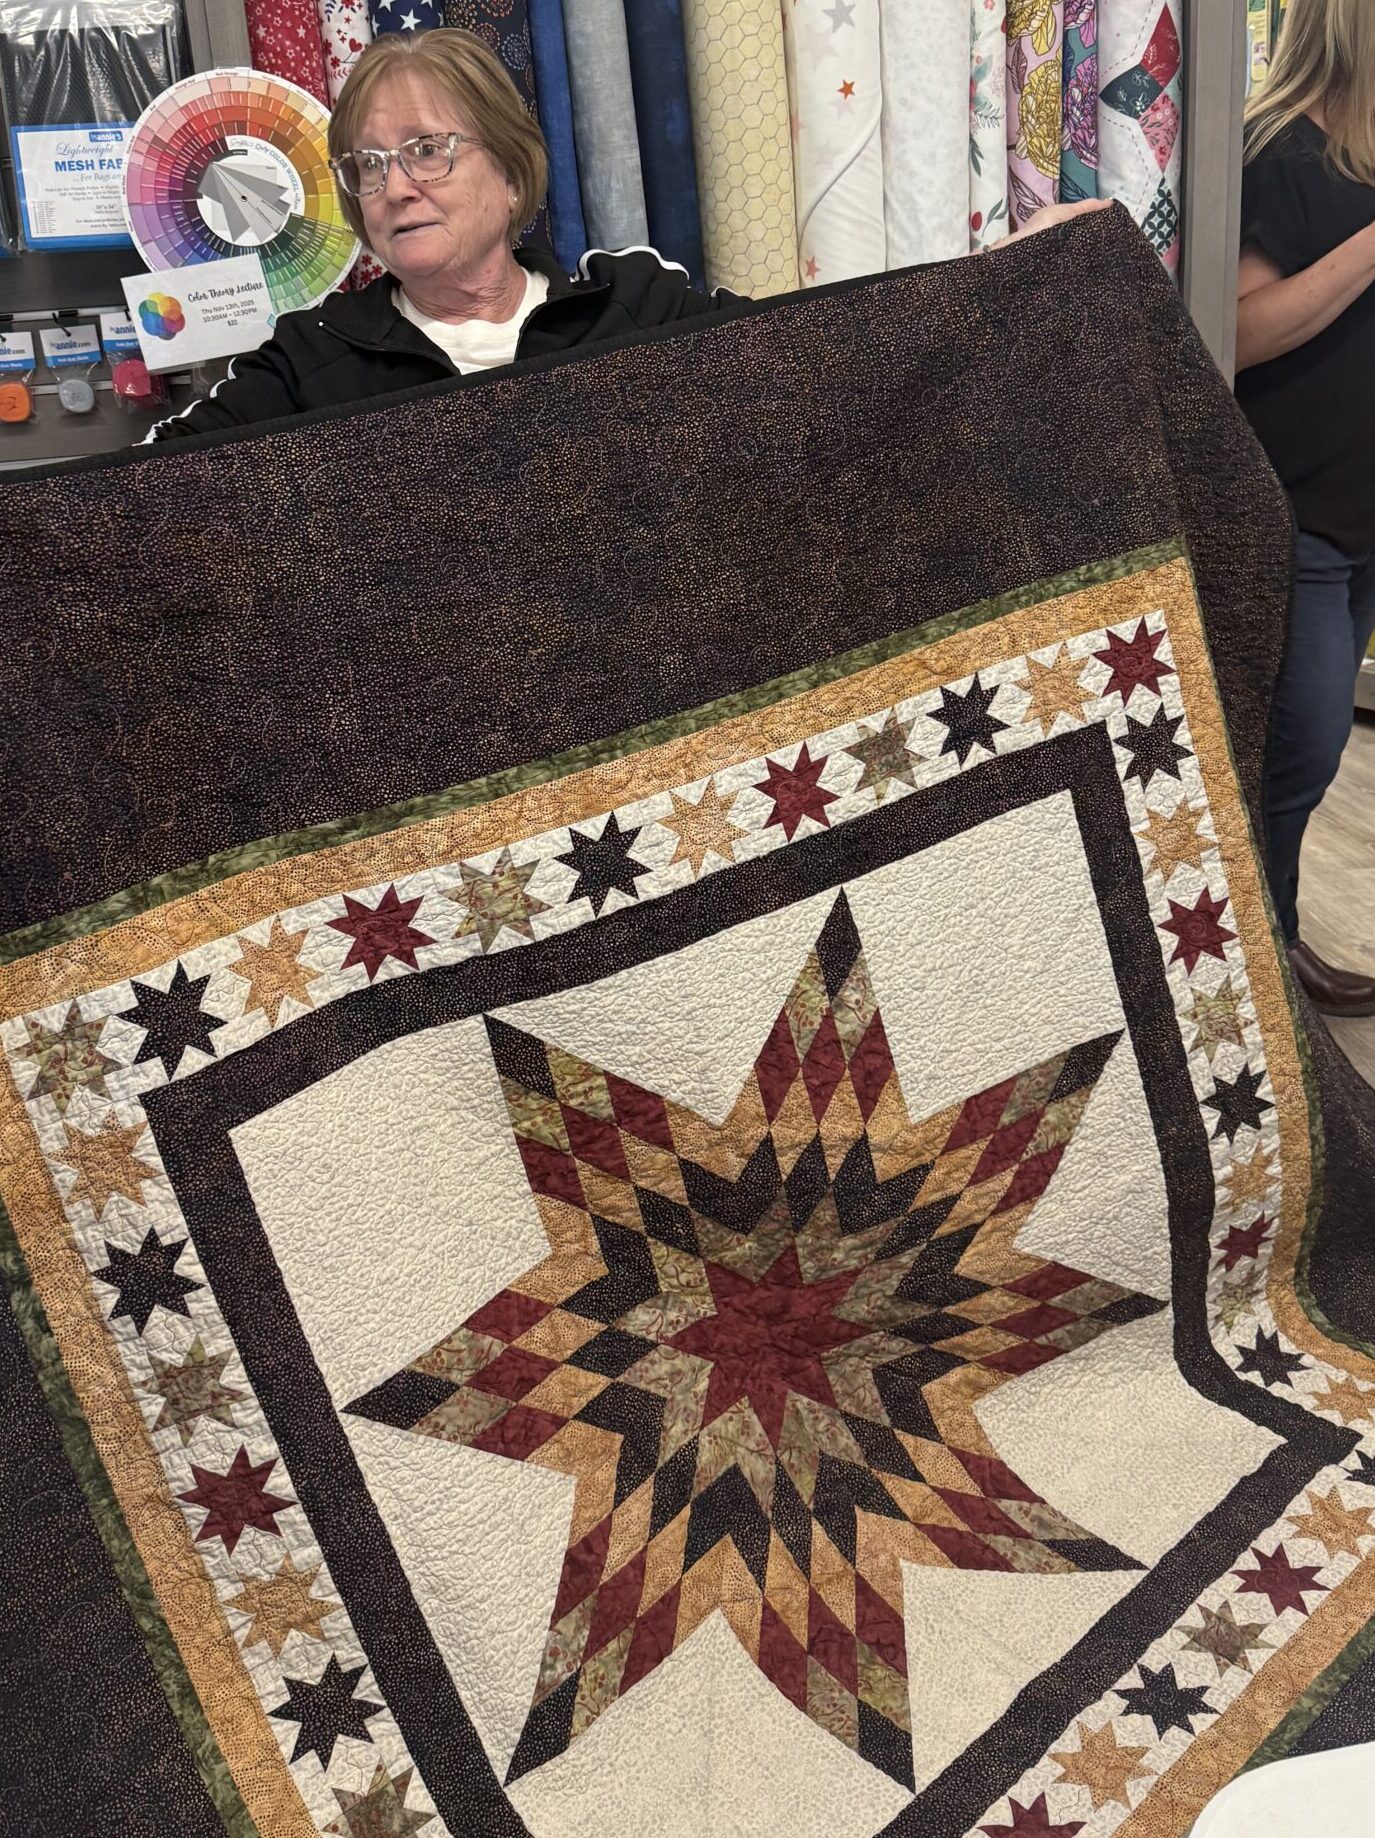
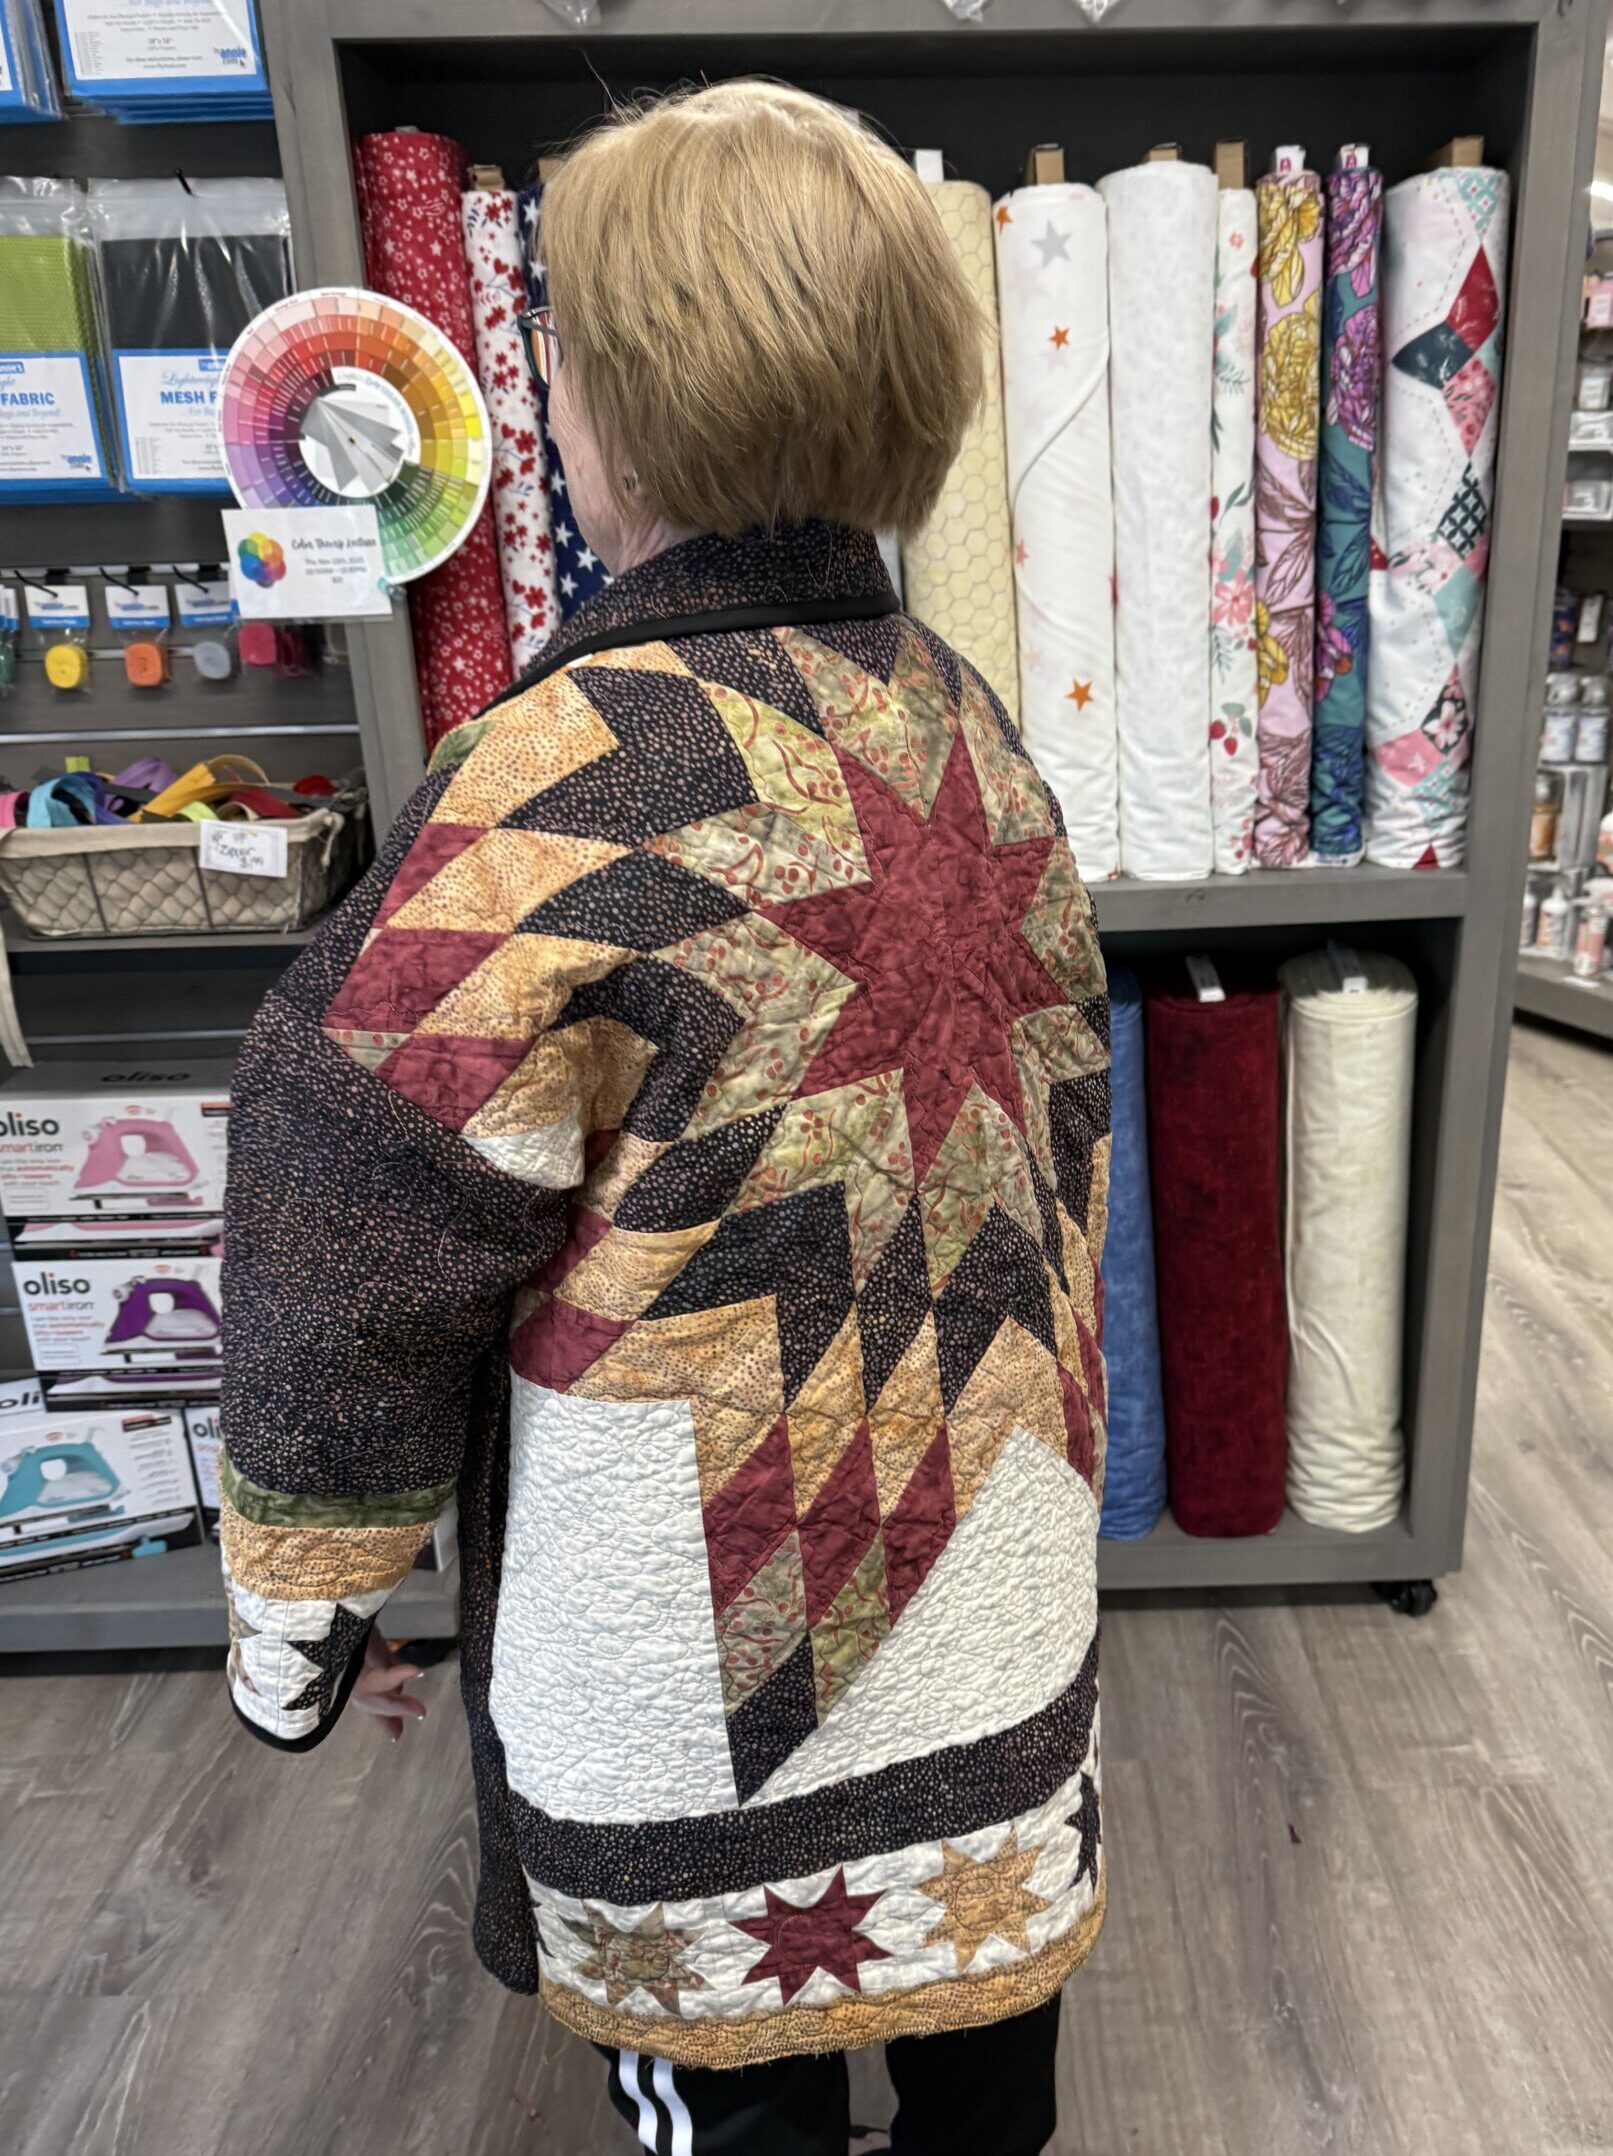
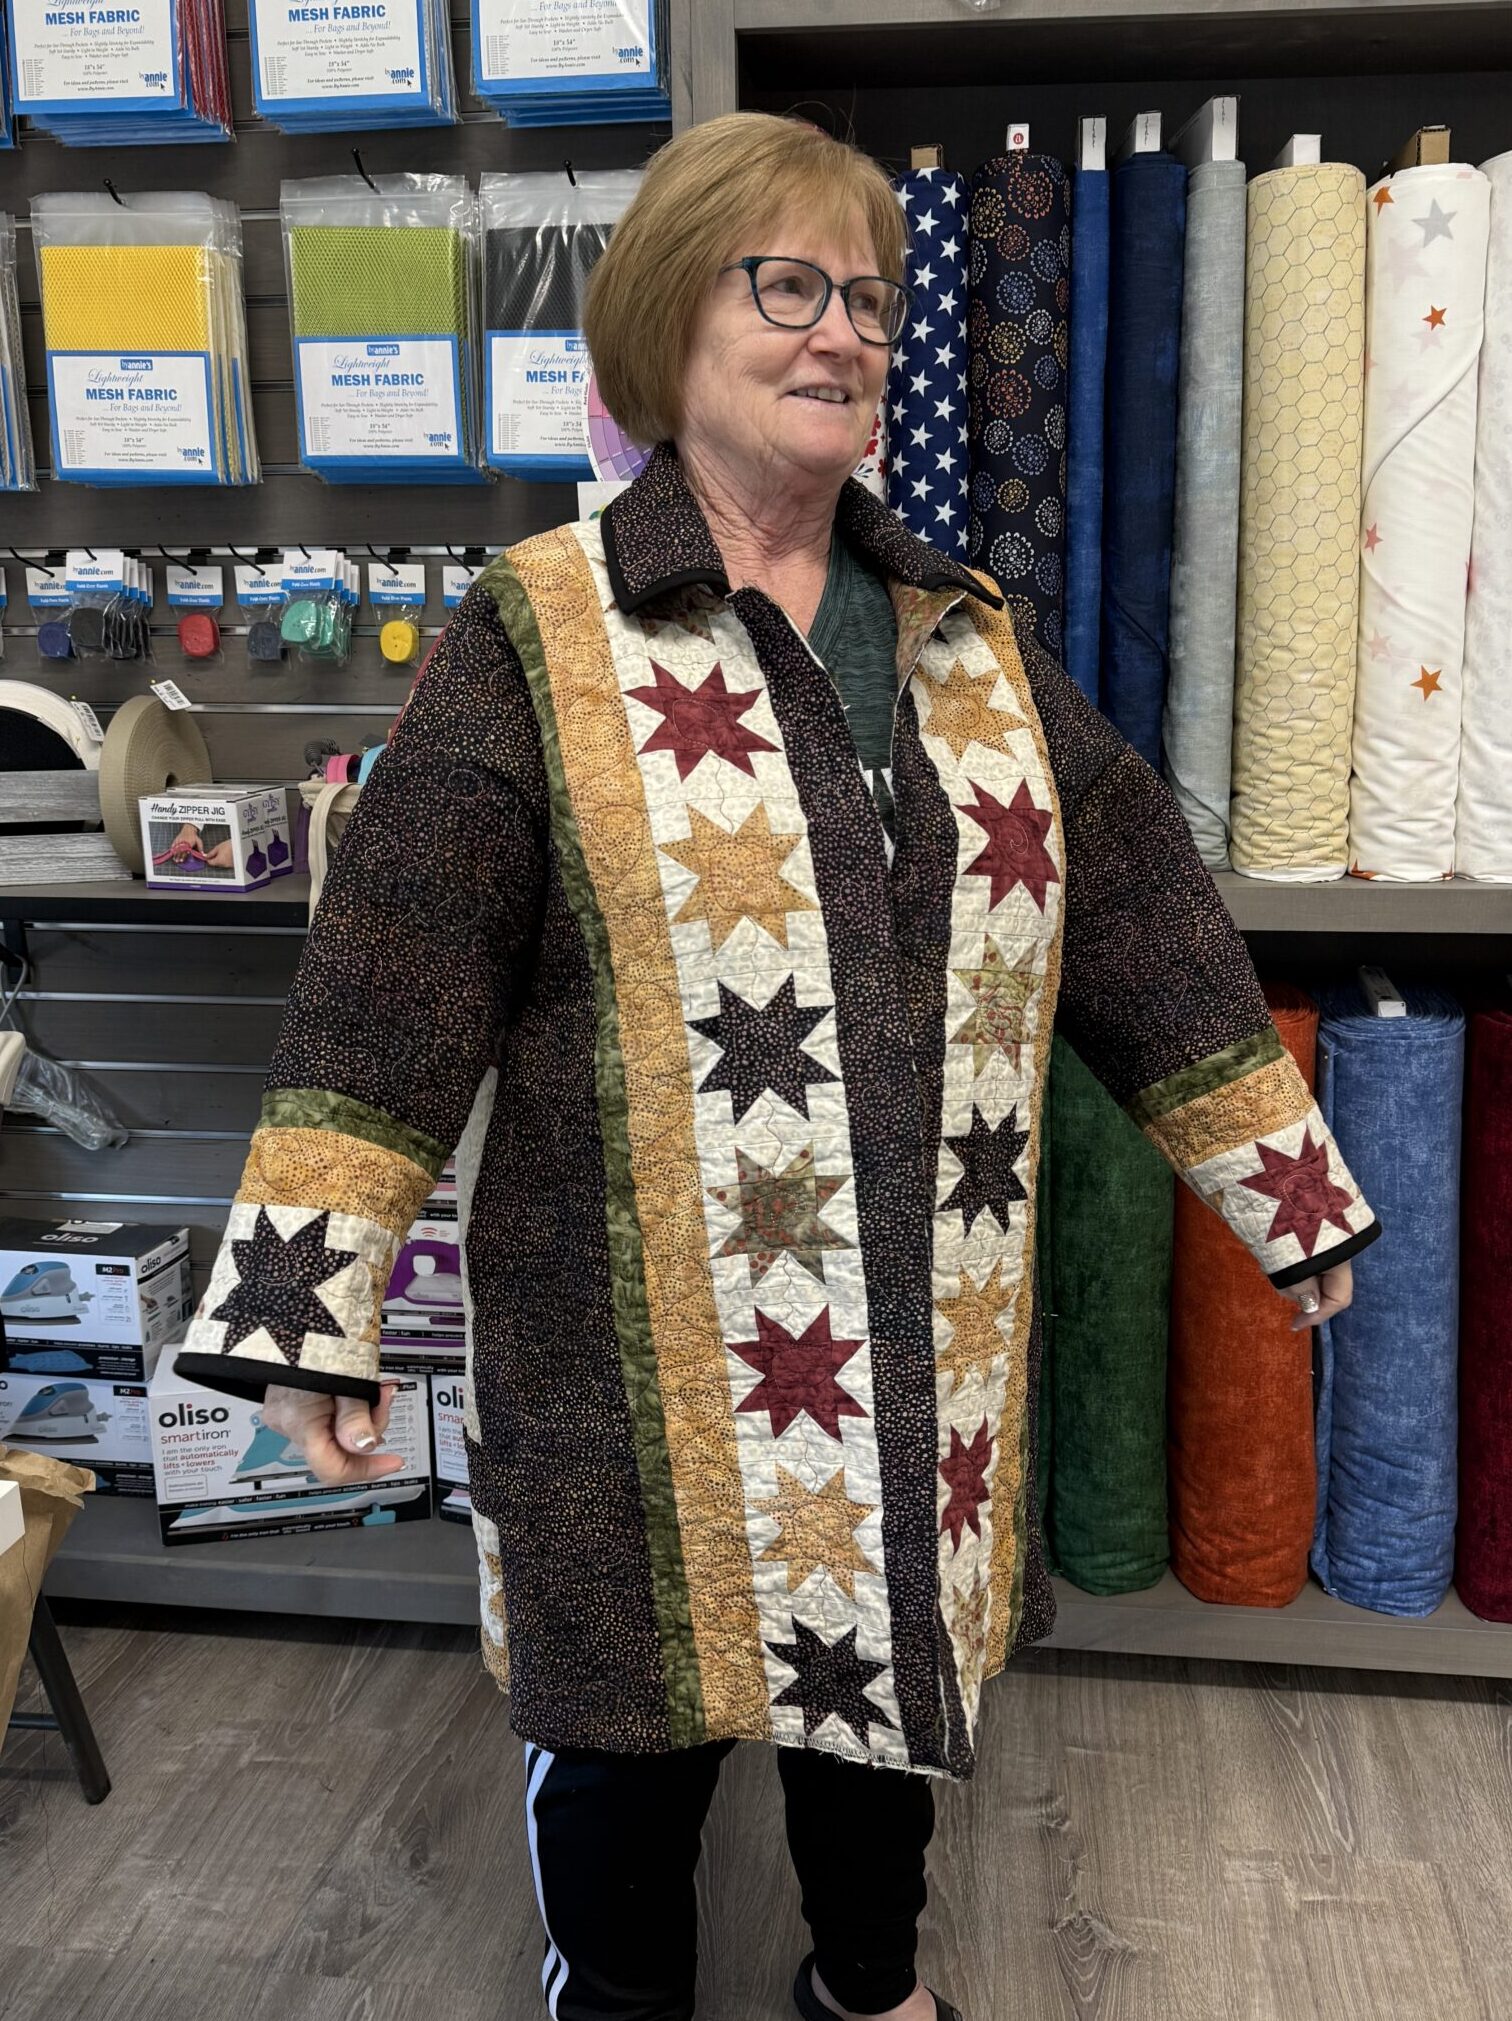
Patty brought in a beautiful Lone Star quilt that she had made. This was so much fun to contemplate layout. We knew the Lone Star itself needed to be the back, but should it be centered? More to one side?
Patty used the Full length and added a Collar. Layout was the most fun with this one and after some back and forth with the class, she decided that it was best to include the stars at the bottom, too. So the back pattern piece shifted down, which worked perfectly to put the center of the Lone Star between her shoulder blades.
She used the stars for her coat front as well as her sleeves, joining it all together beautifully. She used the border to create her collar, which lets the rest of the coat really shine.
Birdie
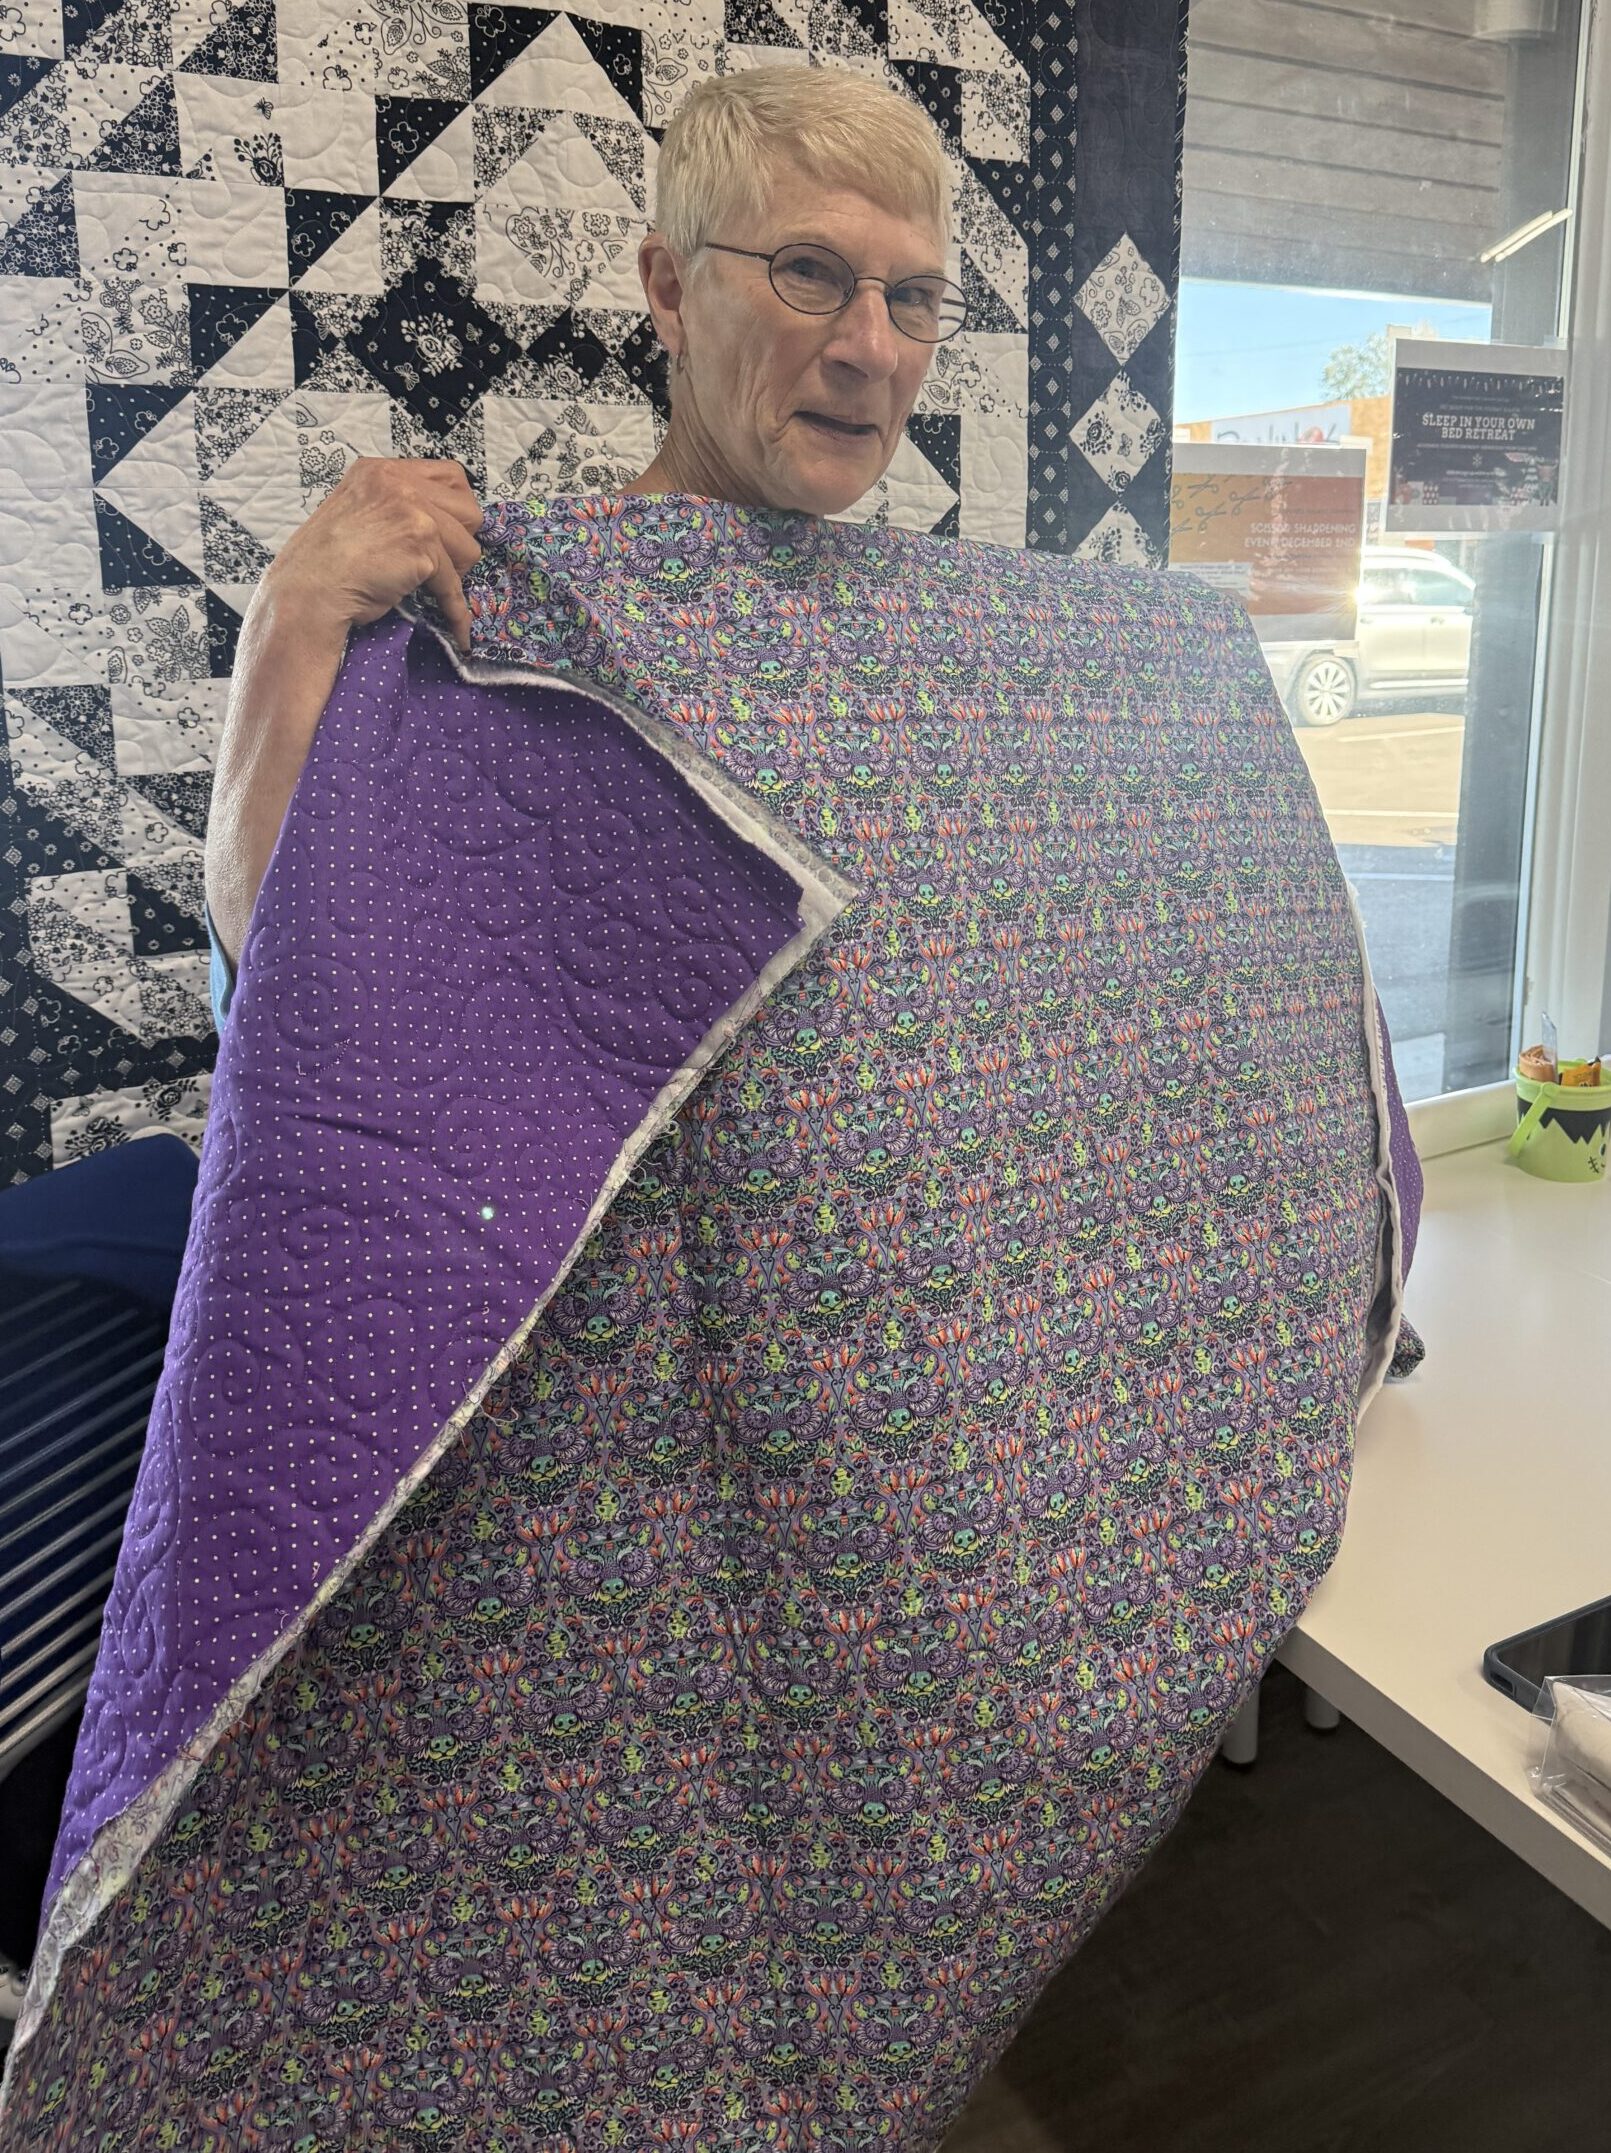
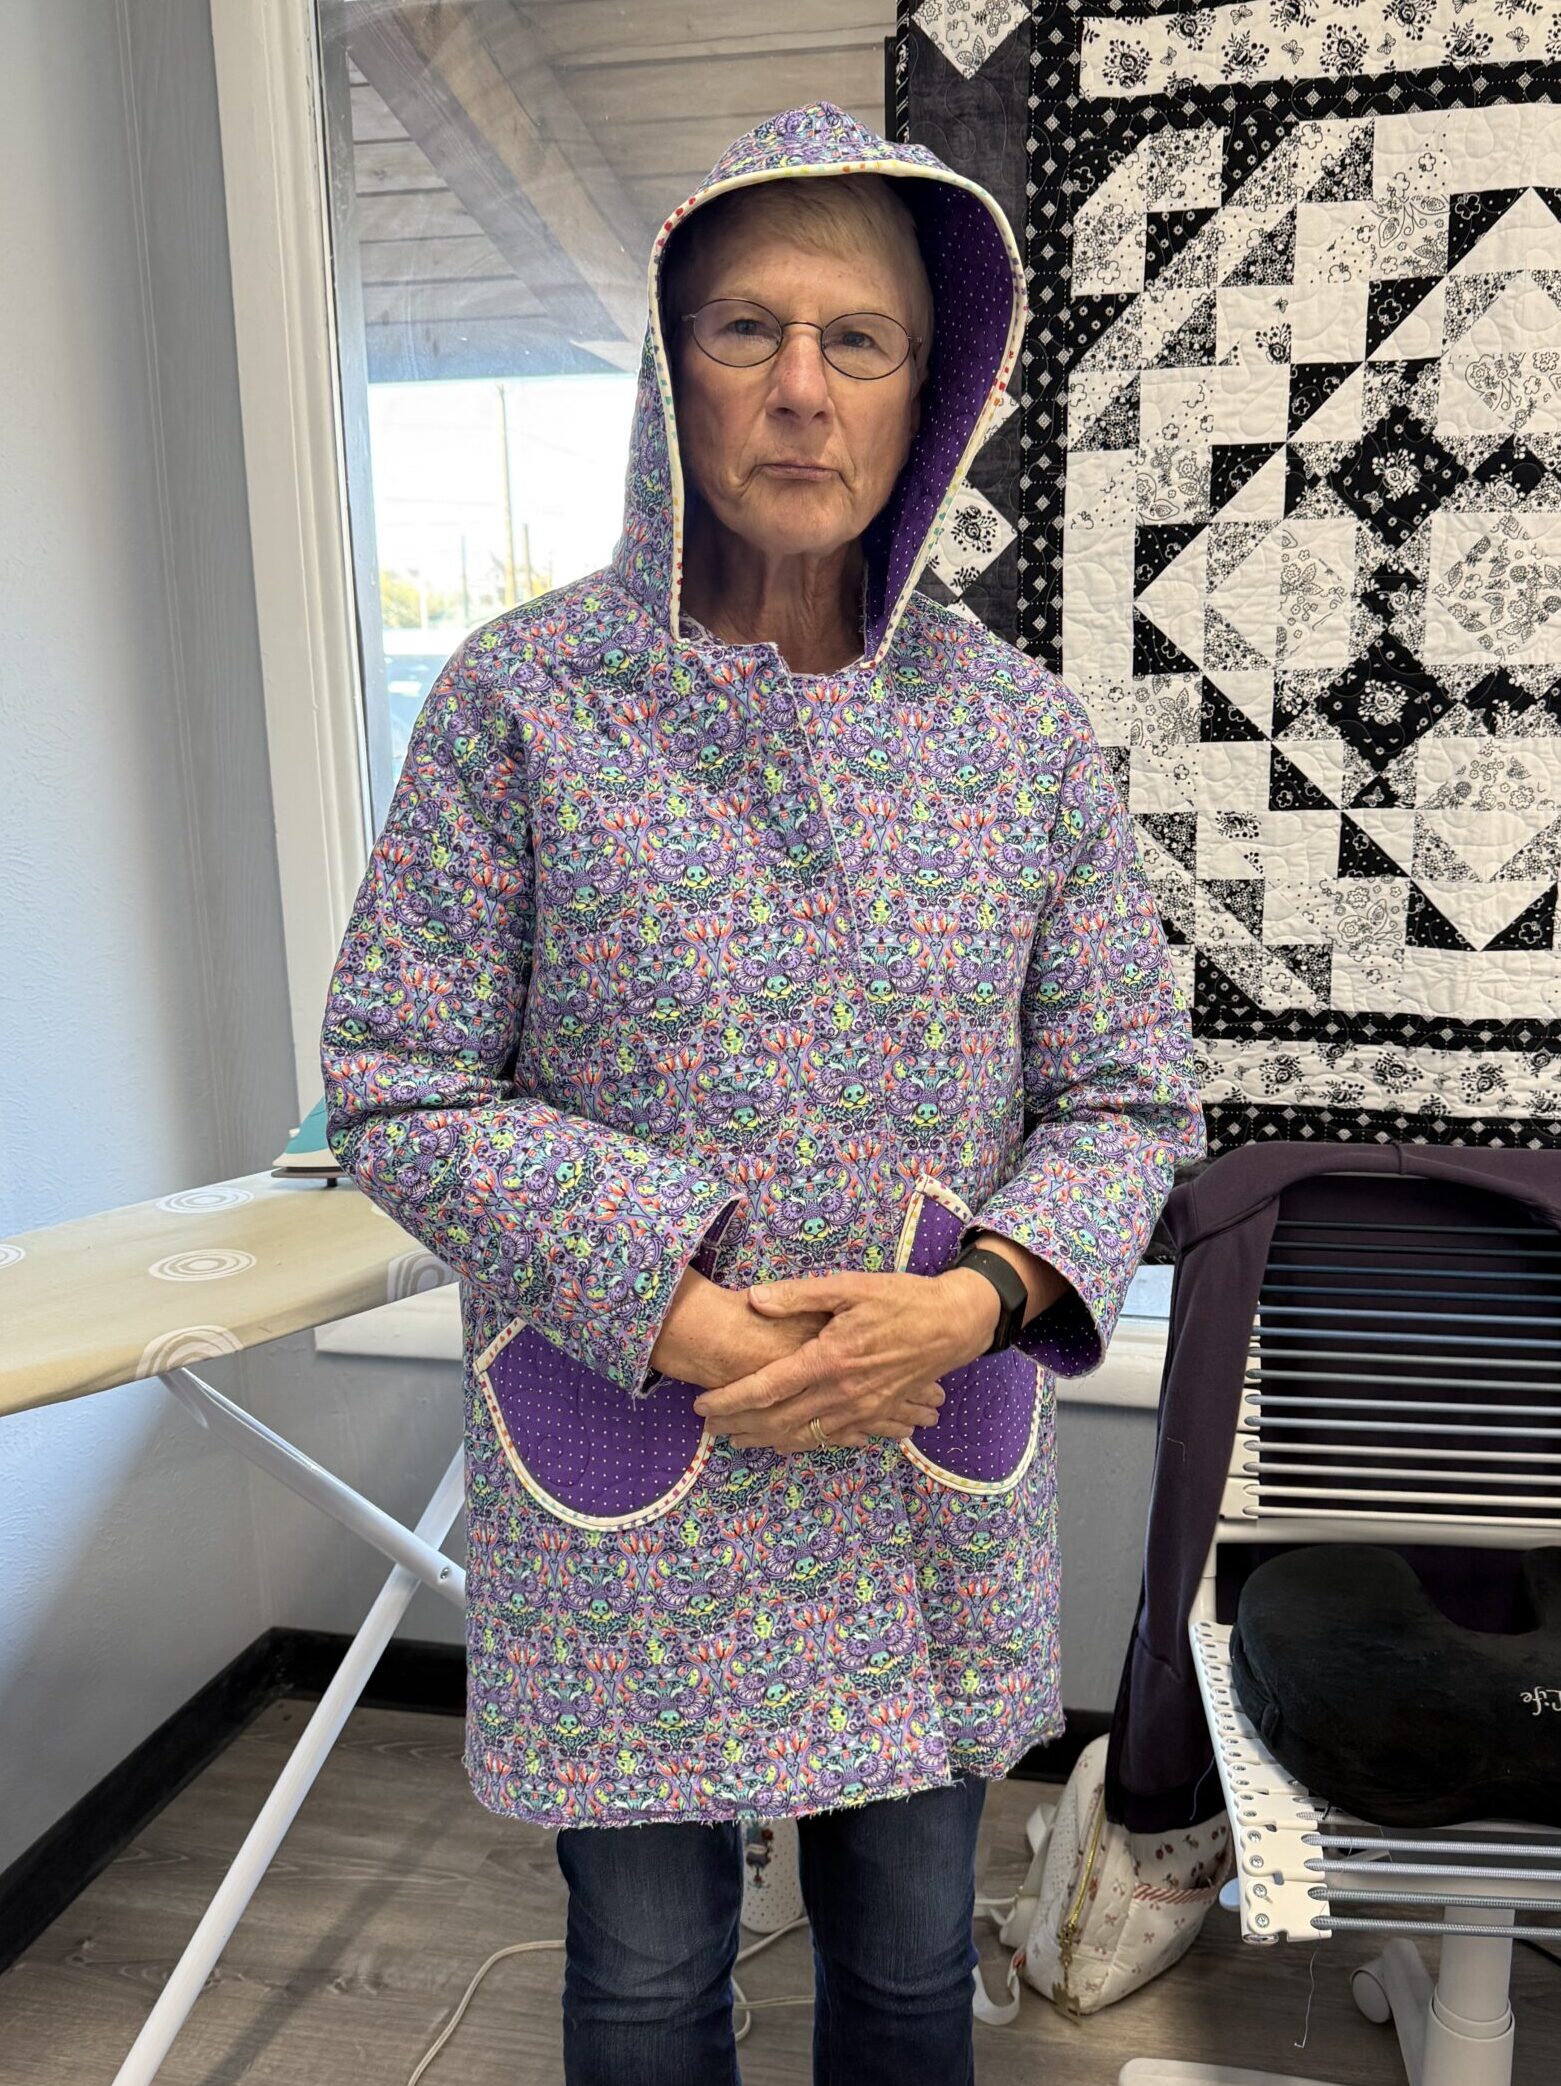
Birdie used some Tula Pink yardage that she had and quilted it on her embroidery machine–it turned out so great. It is a very directional print, so we wanted to make sure the bears stayed facing the right direction.
She used the Full Length and added a Hood, as well as the Patch Pockets. The coordinating purple dot fabric made for such a fun “pop of color”. We worked with getting her patch pockets in the right place, pinning them first, trying them out, repositioning and sewing them down. Birdie pulled out the ruler to make sure they were evenly spaced on both sides. She’ll use the lighter binding fabric around the rest of her coat, as well.
Thanks to everyone who joined me for the class and for working through all the bits with me. I absolutely love seeing folks’ quilt coats come to life–you just never know exactly what you’ll end up with!
A special thanks to Katie at The Quilted Cow in Colorado Springs for bringing me out to teach; it was an honor and a privilege.
Until next time, happy sewing!
Would love for you to make a zoom class
I have taught Zoom classes several times and will host another in January. If you’ve signed up for my newsletter, you’ll be first to know. 🙂
Where can I get the pattern for this quilted jacket?
Thank you
You can find The Elemental Coat pattern in my pattern shop: crinkledreams.com
I love love love Herma’s coat!
So many different beautiful ideas and materials making such incredibly diverse coats. Very creative participants (and instructor)! Really like the look of the lone star jacket. Could also imagine it as a long length coat so could have the full star, border on the bottom and as feasible a border by the top collar. The front placket and sleeves are perfect details.