As quilters, we are often looking for ways to make things easier, whether it’s getting perfect points or removing fold lines or keeping the bias from stretching. There are a variety of different ways of doing all of those, but today we are focusing on using sprays to accomplish it.
There are a wide variety and with the array of sewing I’ve had to do over the past few years, I’m amassed my own personal collection.
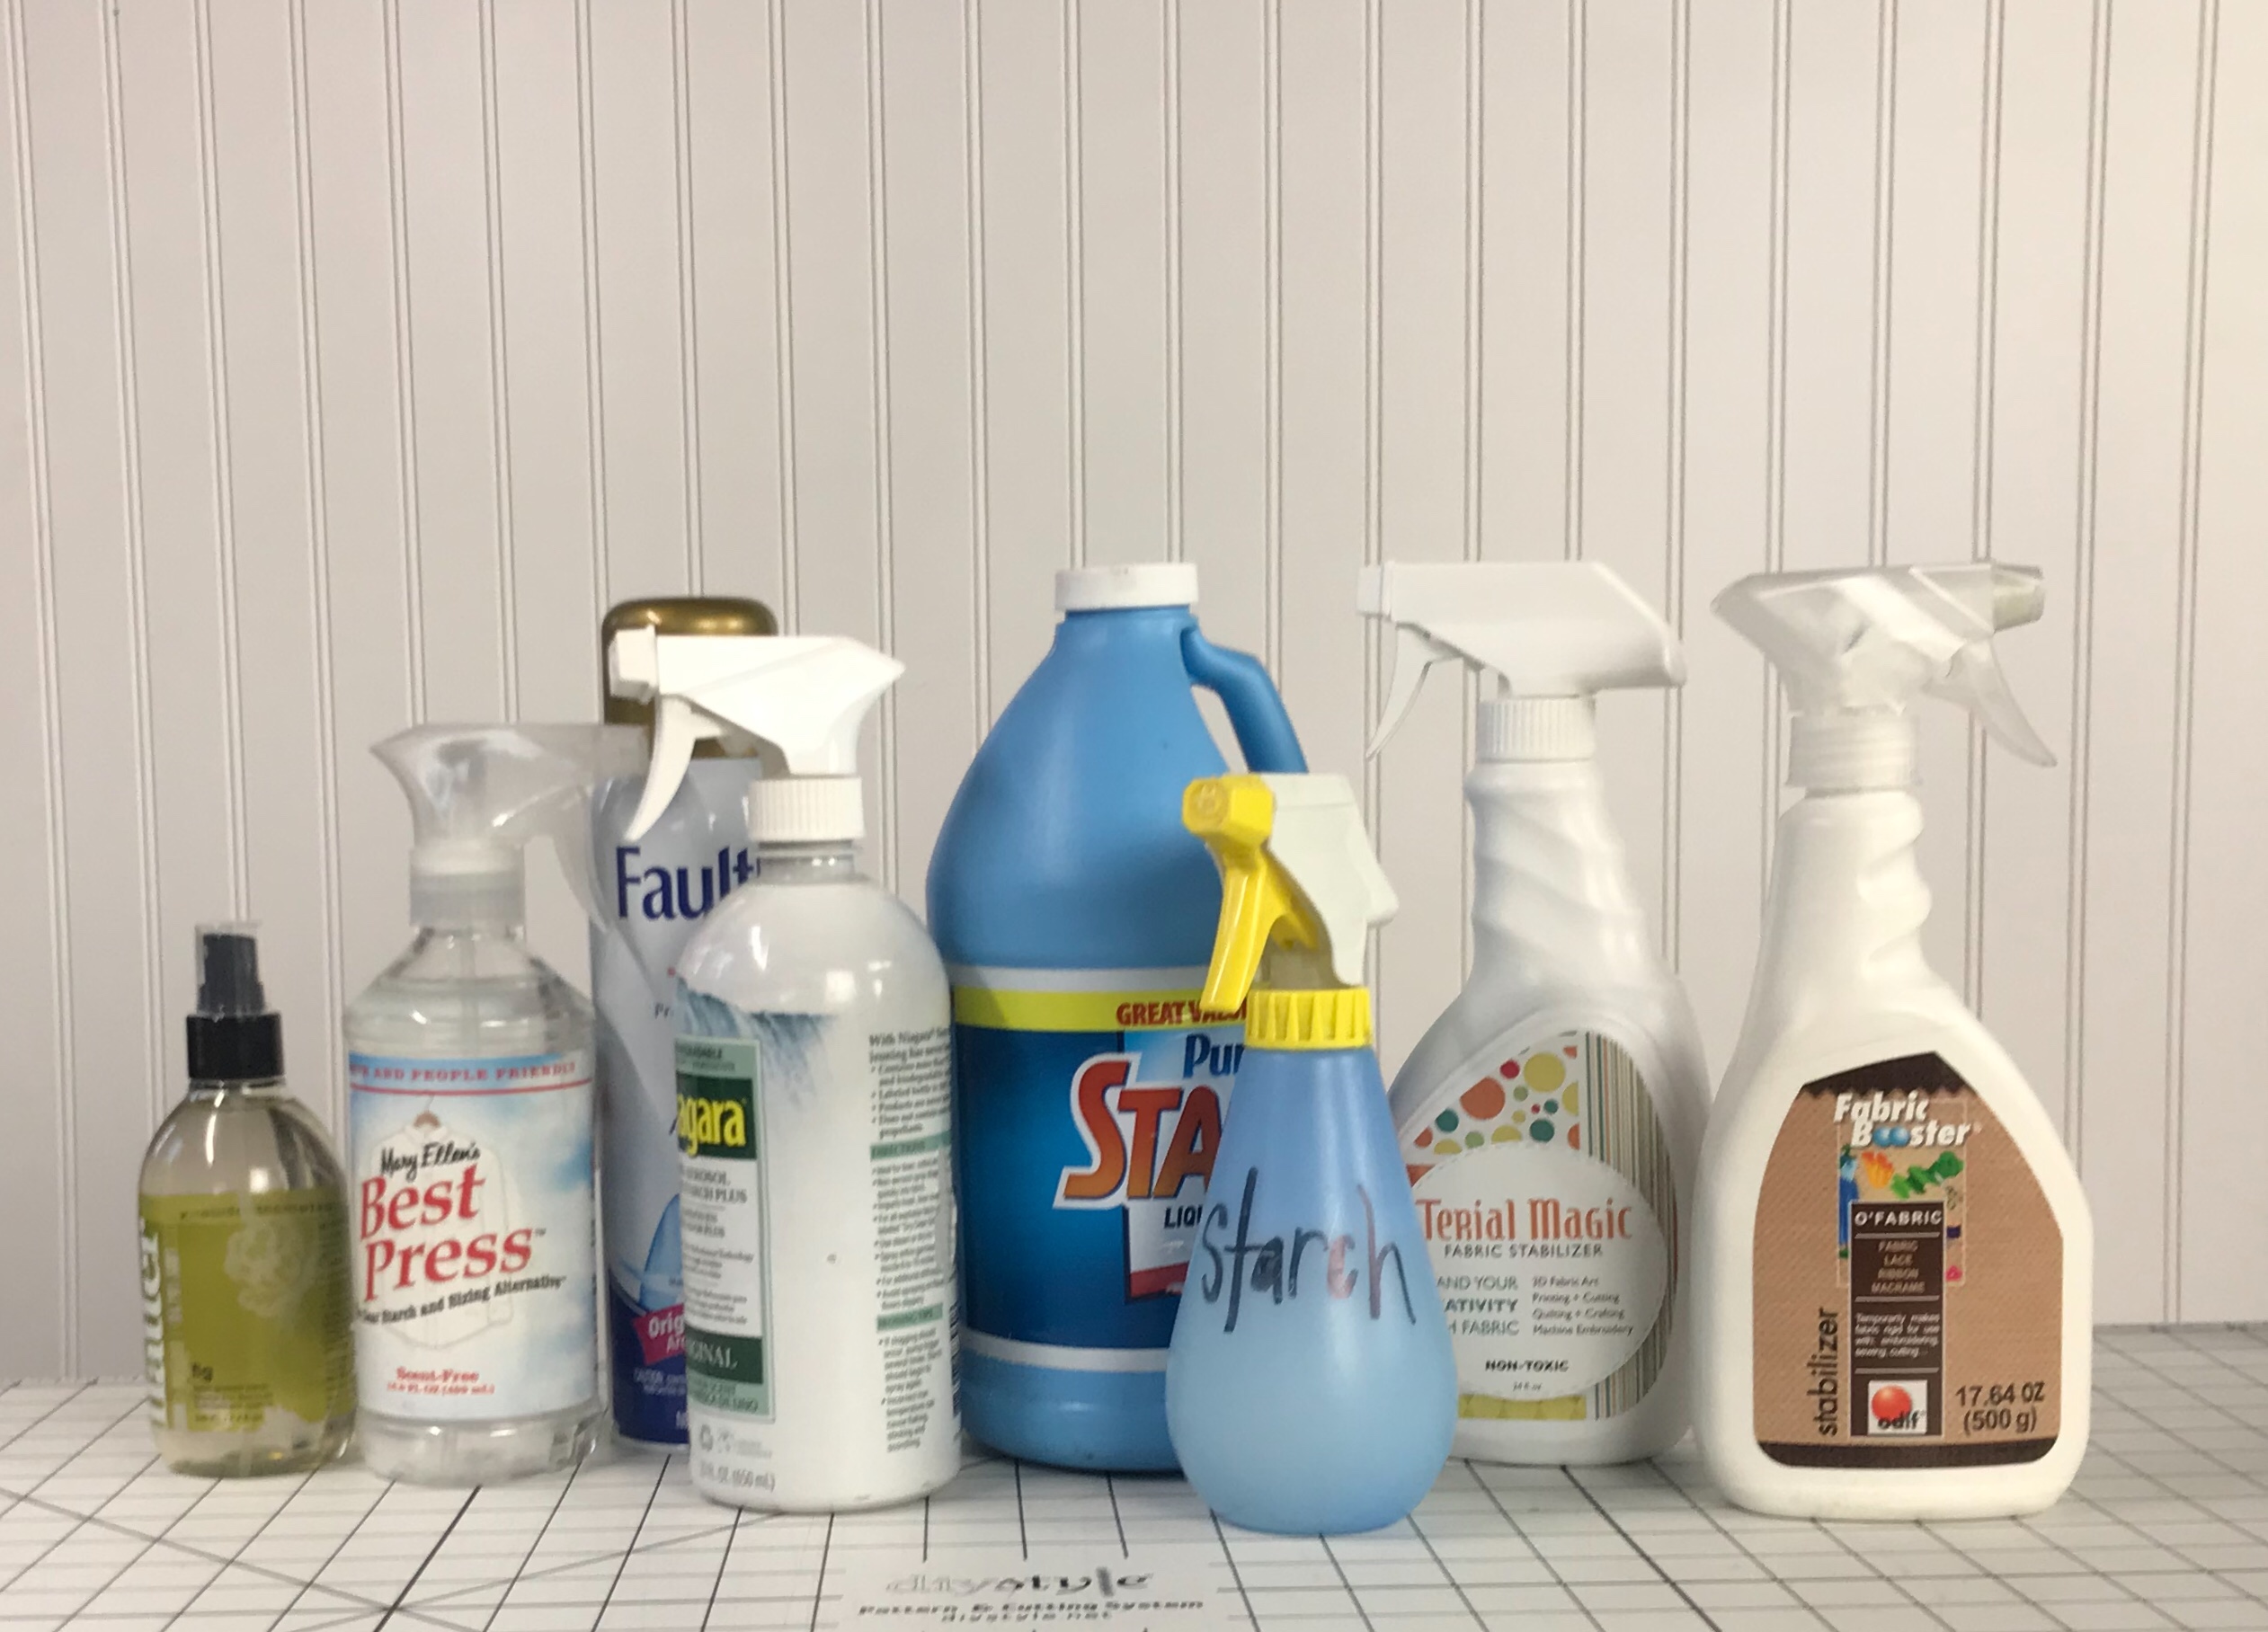
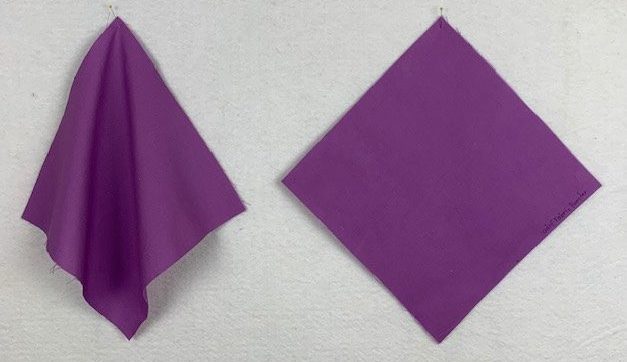
These are (most of) the starch and starch alternatives that I have, ranging from Flatter by Soak to Fabric Booster by ODIF, the sprays make for a varying level of stiffness. To give you an idea of what you might use and when, I took some squares of Robert Kaufman’s Kona Cotton and sprayed each on one side, flipped them over and pressed them. Here’s how they turned out:
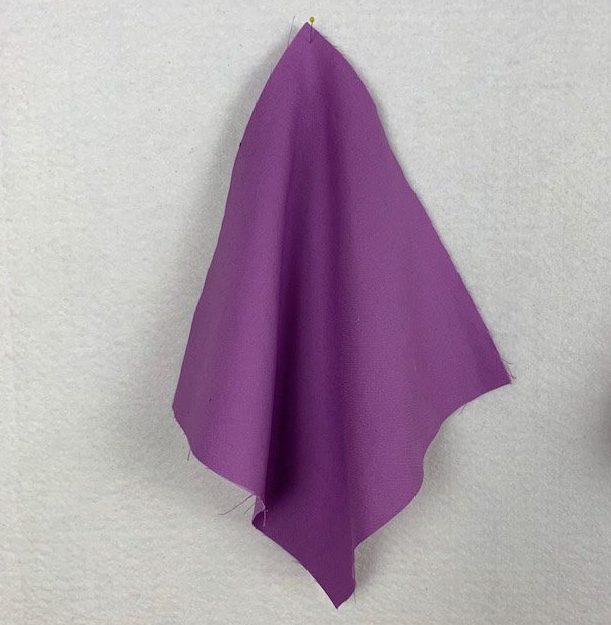 Steam press
Using the steam feature of my Oliso iron, I gave this a good burst of steam to get rid of all the wrinkles and then hung it from the board. You can see the bias drape is lovely, but there’s no added stability to the fabric. I like to use the steam feature when I press my fabric after washing it and when I do a final pressing on my quilt before sending it off to the long-arm quilter. If you have an iron that likes to spit or a dry iron, simply use a little spray bottle to apply a little water first. There are misters out there that work beautifully for just this process.
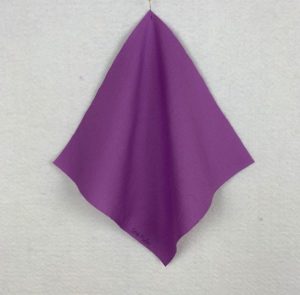 Flatter by Soak
A popular staple in many modern quilters’ cupboards, Flatter is a great finishing spray. It doesn’t stiffen or stabilize the fabric; it simply loosens up the wrinkles and gives a nice finish. The pineapple and fig are my favorite scents, but is available unscented, as well. In my studio, I use Flatter on fabric that I’ve pre-washed (yes, I’m generally a pre-washer for quilting cottons) and also when I’m ironing clothing before wearing. I don’t use it when I am sewing blocks as it doesn’t have the oomph that I want from a spray. YMMV.

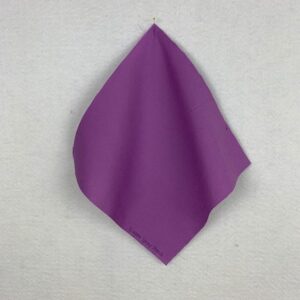
Mary Ellen’s Best Press
Like a starch-lite, Best Press starts giving body to fabric and has been around for years. It’s a “starch and sizing alternative” but works like one: spray it on the fabric, let it soak in for a few seconds and press. It works well for removing tough creases, in my experience, and is available unscented and in a variety of scents. It’s available in all sorts of fabric and quilt stores with sizes ranging from a 6 ounces pump spray to a gallon jug.
I use Best Press most often in my quilting. I spray and press prior to cutting out my fabrics to make it a bit more precise. I’ve found that this helps avoid any stretching and makes sewing bias seams much easier. Use the spray before cutting and when pressing each seam if you really want to keep it in check. I always like to wash it out, but you don’t have to.
Niagara Non-Aerosol Spray Starch
Starch has been used to stiffen fabrics since the mid-1400s, so there’s a long (and possibly sordid) history to it. In the last decade it’s fallen out of favor with some quilters because it is a grain-based product that can be sweet to bugs when it isn’t washed out. My solution: wash your finished project. I do that anyway, but storing quilts that have been made using starch without washing first can attract moths–any textile’s sworn enemy.
Starch can add a lot of body to fabrics and I tend to use it on especially lightweight fabrics such as cotton lawn and double gauze. It will stiffen it considerably, making it easy to work with fabrics that can often be a tad difficult to control. I spray the front, let it soak in then spray the wrong side of the fabric. You can spray several times to get it stiffer and it simply washes out to give the fabric its soft hand back.
Purex Sta-Flo liquid starch
2 parts water to 1 part Sta-Flo
Available only in a gallon jug, this concentrate allows you to mix with water for the perfect body/stiffness that you prefer. I mix mine so that is is fairly stiff (2:1) but you can easily water it down to a 10:1 and still get the wrinkle relaxation that you want. I like to use this when I am working with fabrics that fray or are lightweight since it makes them easier to work with and a jug will last a looooong time (I bought mine almost four years ago). Available at the local grocery store, it’s a quick and easy way to add body and washes right out in the laundry.
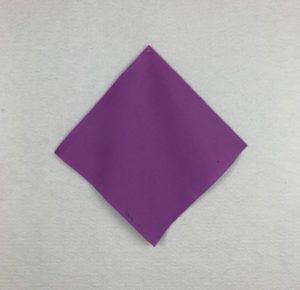
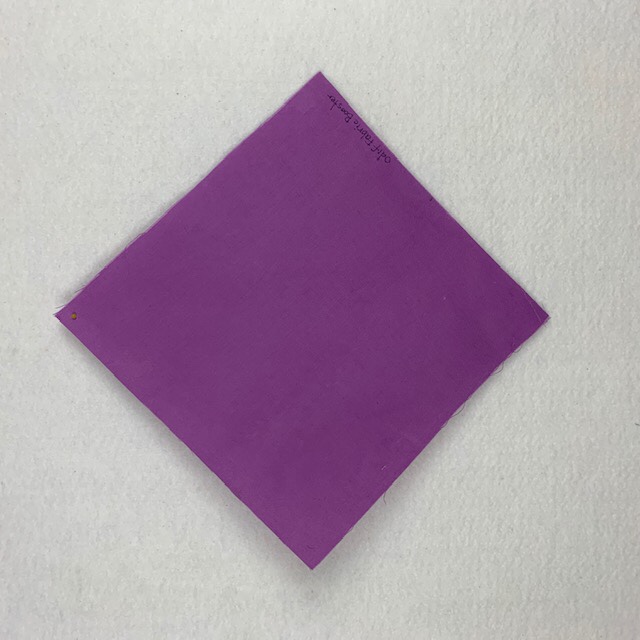 ODIF Fabric Booster
When you need to work with fabric that feels more like cardstock, this is the right tool for you. Fabric Booster, as well as Terial Magic, are used similarly: you soak the fabric with the spray by putting it in a plastic bag, spritzing it and then squeezing, folding, rubbing until the fabric is saturated. Allow it to air dry for a while, then you can press it dry (read the directions on the bottle!). I use a pressing cloth with it and love how stiff it makes the fabric. It’s not a replacement for Best Press or Flatter, but it works great when you are looking to really add stiffness that will then wash out. I’ve heard of it being used for t-shirt quilts and I’ve made a bunch of fabric origami with it. Otherwise, I really just want to use it for those cheesecloth ghosts my mom used to make in the 70s. It washes out in the laundry, as well.
Whether you are trying to remove wrinkles, add body or stiffen your fabric, there are multiple products that are available to help. Depending on your preference, choose the one that works best for your need. It really isn’t one size fits all here, either (which explains why I had all of these in my studio!).
Don’t forget to check out the other blog stops in our Back to School Blog Hop:
Day 1 – September 1 – Sam Hunter: Sewing Long Seams Without Stretching – huntersdesignstudio.com
Day 2 – September 2 – Susan Arnold – Joining Binding the Easy Way – quiltfabrication.com
Day 3 – September 3 – Angie Wilson – Fussy cutting tips and techniques – www.gnomeangel.com
Day 4 – September 4 – Andi Stanfield – No-Mark HST: Let your machine be your guide – truebluequilts.com/blog/
Day 5 – September 5 – Bobbie Gentili – Say YES to Y-seams – geekybobbin.com
Day 6 – September 6 – Mel Beach – 5 Reasons to Say Woo Hoo! to School Glue – pieceloveandhappiness.blogspot.com
Day 7 – September 7 – Laura Piland – 7 Ways to Use a Laser on Your Sewing Machine – www.sliceofpiquilts.com
Day 8 – September 8 – Suzy Webster – How to solve loops in free motion quilting – www.websterquilt.com
Day 9 – September 9 – Tara Miller – Accurate Stitch-and-Flip Corners – quiltdistrict.com
Day 10 – September 10 – Latifah Saafir – Accurate Seams Using Masking Tape! – latifahsaafirstudios.com
Day 11 – September 11 – Sarah Ruiz – The Magic of Glue Basting – saroy.net
Day 12 – September 12 – Jen Shaffer – Ways to stop your ruler from slipping while cutting – patternsbyjen.blogspot.com
Day 13 – September 13 – Cheryl Sleboda – Basics of ruching (a vintage fabric manipulation technique) – muppin.com
Day 14 – September 14 – Raylee Bielenberg – Choosing quilting designs for your quilt – www.sunflowerstitcheries.com
Day 15 – September 15 – Jen Strauser – Accurate and Attractive Machine binding – dizzyquilter.com
Day 16 – September 16 – Jane Davidson – Matching points for all types of intersections – quiltjane.com
Day 17 – September 17 – Teresa Coates – Starch and starch alternatives – teresacoates.com <<—- you are here!
Day 18 – September 18 – Jen Frost – Benefits of spray basting – faithandfabricdesign.com
Day 19 – September 19 – Sandra Starley – Getting started with Hand Quilting – utahquiltappraiser.blogspot.com
Day 20 – September 20 – Karen Platt – Drunkard’s Path Made Easy – karenplatt.co.uk/blog/
Day 21 – September 21 – Kris Driessen – All Kinds of Square (in a Square) – scrapdash.com
Day 22 – September 22 – Sarah Goer – Planned Improv Piecing – sarahgoerquilts.com
Day 23 – September 23 – Kathy Bruckman – Organizing kits for on-the-go sewing – kathyskwiltsandmore.blogspot.com
Day 24 – September 24 – Cheryl Daines Brown – The Secret to Flat Quilt Tops: Borders – quilterchic.com
Day 25 – September 25 – Cherry Guidry – Pre-assembling fusible applique – cherryblossomsquilting.com
Day 26 – September 26 – Laura Chaney – Getting started with English Paper Piecing – prairiesewnstudios.com
Day 27 – September 27 – Ebony Love – Cutting Bias Strips from a Rectangle – lovebugstudios.com
Day 28 – September 28 – Tammy Silvers – Working with heavier weight threads in your machine – tamarinis.typepad.com
Day 29 – September 29 – Kathy Nutley – Create a perfect facing or frame with 90 degree angles – quiltingsbykathy.com
Day 30 – September 30 – Joanne Harris – Using Leaders and Enders – quiltsbyjoanne.blogspot.com
